


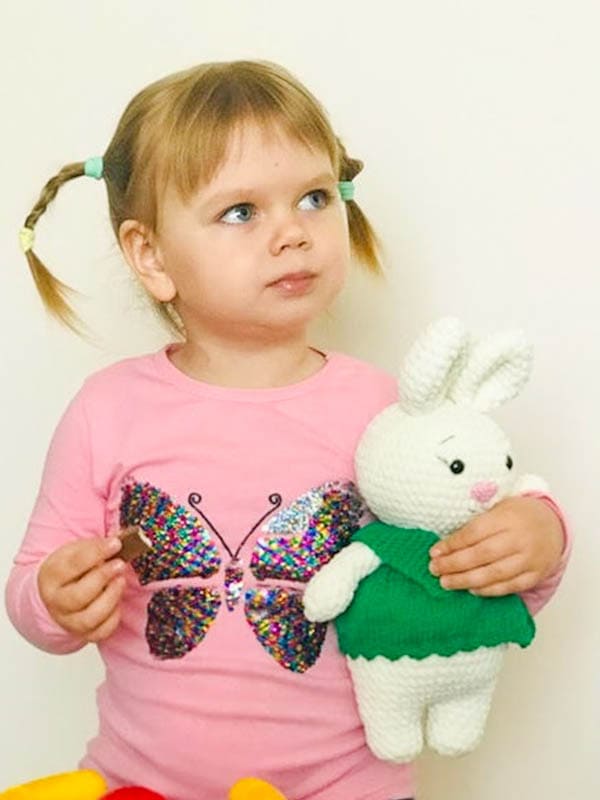
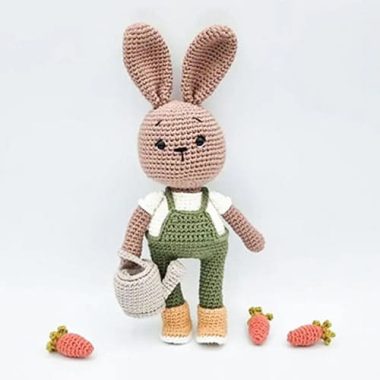
Hello everyone, happy week friends, we are here again with a wonderful amigurumi pattern. Today we have prepared a small plush bunny amigurumi pattern with a green summer dress. A big thank you to the designer for this wonderful amigurumi pattern. In addition, there are more different rabbit models on our site. For this, you can take a look at our categories. Have fun. Happy weeks.
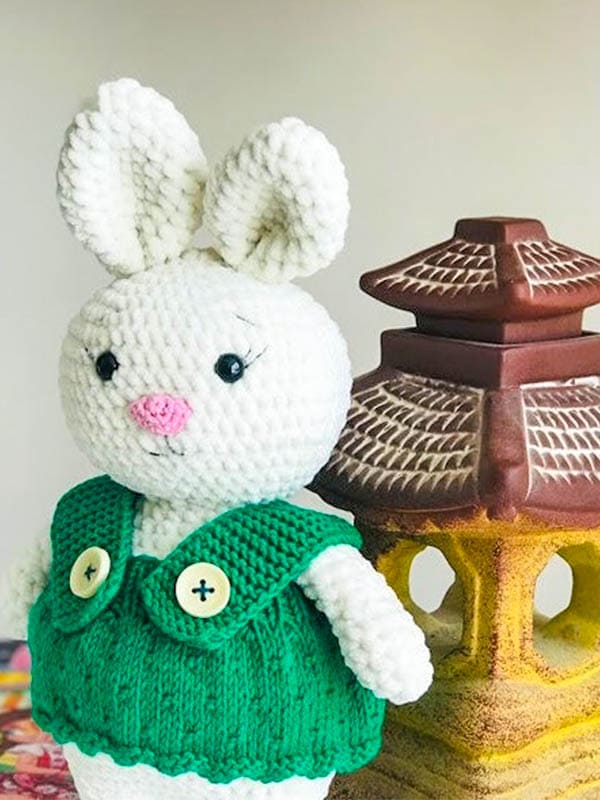
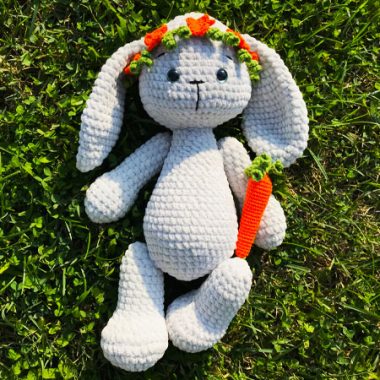
plush white amigurumi toy bunny! A great combination with a pink nose and a cute green summer dress. A completely handmade amigurumi rabbit toy designed for your children to have a pleasant time. You will have a lot of fun while making this toy crochet bunny. Now we leave you alone with the pattern.
Crochet Plush Bunny PDF Amigurumi Free Pattern
Designer:
Instagram: natty.toys
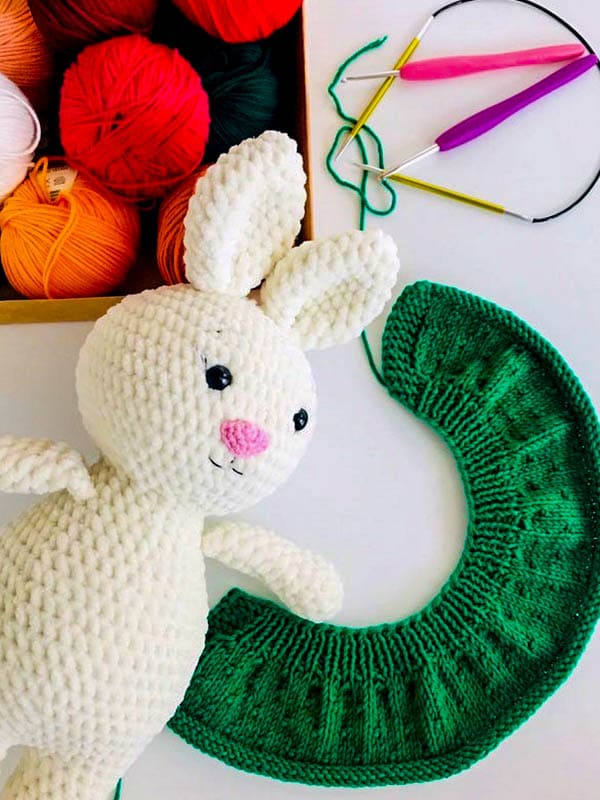
Materials
For a toy:
•Color A- plush yarn of Himalaya Dolphin baby (№80308) 1 skein (120m (131yd)- 100g)
•Color C- (pink)- for knitting a nose: pink Gazzal baby cotton (160m (175 yd)- 50g)
•Plastic eyes (2 pieces)
•Sewing threads for sewing parts
•Black threads for embroidering of the muzzle
•Fiberfill for filling toys (100g)
For a sundress:
•Color B- yarn for knitting the sundress: Gazzal baby cotton (№3456) (160m (175 yd)- 50g)
•3 small buttons, 2 big buttons


Tools
•4mm, 2.5mm crochet hooks
•Needles 3,5mm
•Large needle for stitcging the parts of the toy
•Knitting markers (to mark the beginning of rounds)
Abbreviations
Crochet:
R– round
inc– single crochet increase, 2 single crochets in one stitch
dec– single crochet decrease, 2 single crochet 2 stitches together
sc– single crochet
Crochet Bunny Pattern
Using the yarn of color A, crochet hook 4mm
The thread with the body are crocheting as one piece.
After that to sew arms, ears and tail.
Head
(place a marker at the beginning of the round)
R1: macig ring (7)
R2: (inc)*7 (14)
R3: (inc)*14 (28)
R4: (3sc,inc)*7 (35)
R5: (4sc,inc)*7 (42)
R6: (5sc,inc)*7 (49)
R7: (6sc,inc)*7 (56)
R8-13: 49sc (6 rounds)
R14: (6sc,dec)*7 (49)
R15: (5sc,dec)*7 (42)
R16: (4sc,dec)*7 (35)
R17: (3sc,dec)*7 (28)
R18: (dec)*14 (14)
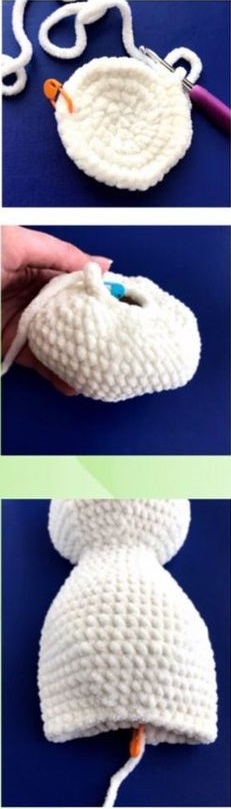
Continue to crochet the body
R19: (1sc,inc)*7 (21)
R20: sc (21)
R21: (2sc,inc)*7 (28)
R22: sc (28)
R23: (3sc,inc)*7 (35)
R24: sc (35)
R25: (4sc,inc)*7 (42)
R26: sc (42)
R27: (5sc,inc)*7 (49)
R28-32: 49sc (5 rounds)
R33: dec, 3sc, dec, 2sc, dec, 14sc, dec, 6sc, dec, 14sc (44)
R34: sc (44)
R35: dec, 4sc, dec, 14sc, dec, 4sc, dec, 14sc (40)
R36: sc (40)
R37: dec, 2sc, dec, 14sc, dec, 2sc, dec, 14sc (36)
R38: sc (36)
R39: dec, dec, 14sc, dec, dec, 14sc (32)
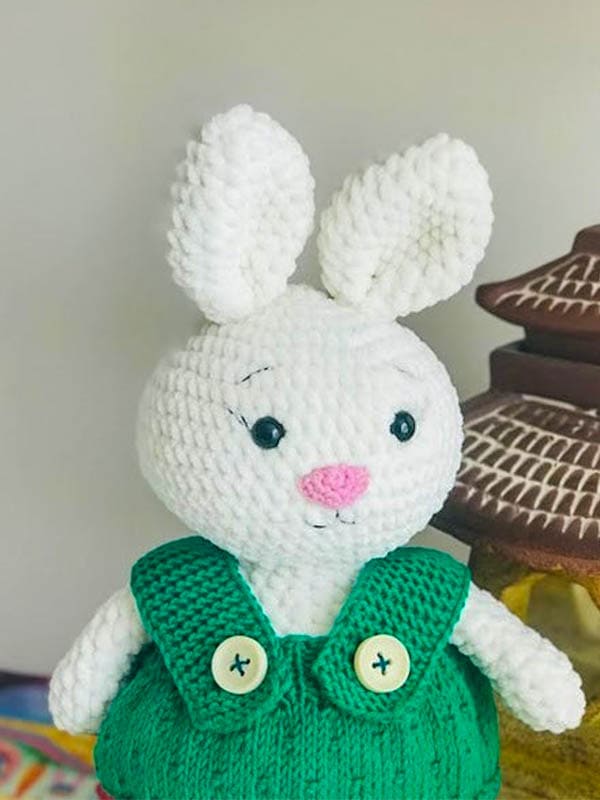
The black points marked in the picture lines of decreases.
Find them on your crochet toy.
Insert safe plastic eyes.
Keep safety eyes symmetrical to the lines of decreases.
Eyes are fixed between 8 and 9 rounds from the upper point of the head.
The distance between the eyes is 7sc.
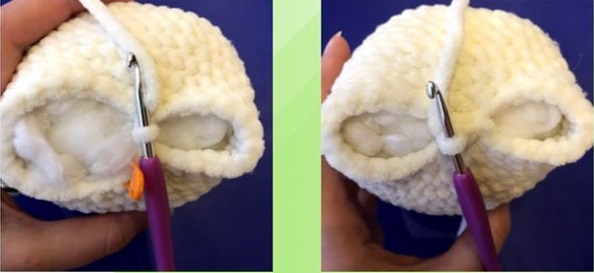
To stuff a toy with the fiber filler.
Double up the front and back part of the toy, crochet in the middle 3sc.
Carefully count the stitches to form two identical holes for the legs at 14sc (see the picture below).
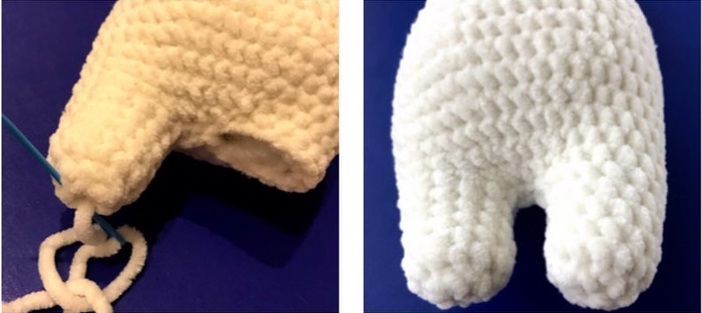
Crochet legs completely with body.
Legs (2 details)
R1-5: 14sc
R6: (dec)*7 (7)
Fill the leg with a fiberfill.
To draw the thread through 7 loops and tighten. Cut and secure the thread in the leg. Also crochet the second leg.

Nose
Using color C (pink), Crochet hook 2.5mm
R1: magic ring (6)
R2: (inc)*6 (12)
R3: (1sc,inc)*6 (18)
Fold as show in the photo and sew on the face of the bunny.
Arms (2 details)

R1: magic ring (6)
R2: (inc)*6 (12)
R3-5: 12sc (3 rounds)
R6: (dec)*3 times, 6sc (9)
R7-12: 9sc (6 rounds)
Double up, crochet 4 stitches cut and secure the thread. Sew the arms.
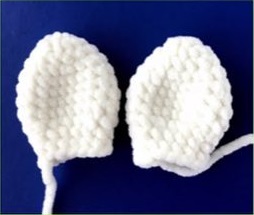
Ears (2 details)
R1: magic ring (7)
R2: (inc)*7 (14)
R3: sc (14)
R4: (1sc,inc)*7 (21)
R5-8: 21sc (4 rounds)
R9: (1sc,dec)*7 (14)
R10-11: 14sc (2 rounds)
Cut and secure the thread.
Fold in half and then quadruple and sew on top of the head at a distance of 1-2 cm from each other.
Tail
R1: magic ring (7)
R2: (inc)*7 (14)
R3: (1sc,inc)*7 (21)
R4: (1sc,dec)*7 (14)
R5: (dec)*7 (7)
Cut and secure the thread. Sew at the bottom on the black of the bunny. Embroider with black thin threads eyebrows, eyelashes, mouth as show on the picture.
Sundress Pattern
Knitting:
Edge st- edge stitch
Sts- stitchs
p– purl stitch
k– knit stitch
YO– yarn over
KOK– increase (k1, YO, k1- in one stitch)
K2tog– knit next 2 stitches together
Knitting pattern
Using the yarn B and 3.5 mm needles, cast on 71 sts (69 sts+ 2 edge sts).
Edge sts: the first st is slip, the last st is purl.
Row 1: k4, (p1,k1)*30 times, p1,k4
Row 2: k4, (k1,p1)*30 times, k1,k4
Row 3: k4, (p1,k1)*30 times, p1,k4
Row 4: k4, (k1,p1)*30 times, k1,k4
Row 5: k4, (p1,k1)*30 times, p1,k4
Row 6: k4, (k1,p1)*30 times, k1,k4
Row 7: k4, (p1,k1)*30 times, p1,k4
Row 8: k4, (KOK,k2)*30 times, KOK, k4
Row 9: k4, p103, k4
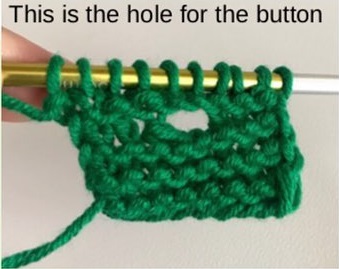
Row 10: k2, to make the hole for the button: YO, K2tog, k107
Row 11: k4, p103, k4
Row 12: k4, (k3,p1)*25 times, k7
Row 13: k4, p103, k4
Row 14: k111
Row 15: k4, p103, k4
Row 16: k5, (p1,k3)*25 times, p1,k5
Row 17: k4, p103, k4
Row 18: k2, to make the hole for the button: YO, K2tog, k107
Row 19: k4, p103, k4
Row 20: k4, (k3,p1)*25 times, k7
Row 21: k111
Row 22: k111
Row 23: k4, p103, k4
Row 24: bind off knit
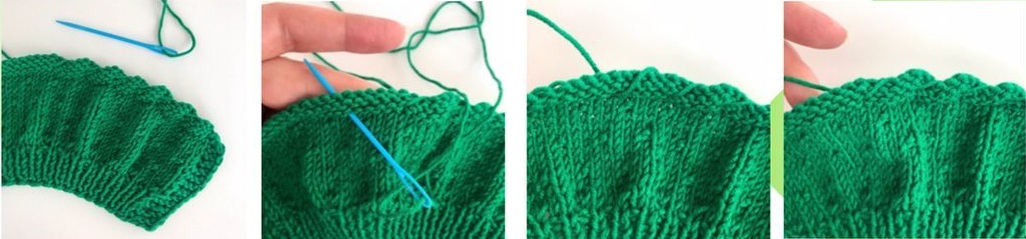
Leave 25 cm of thread, cut it.
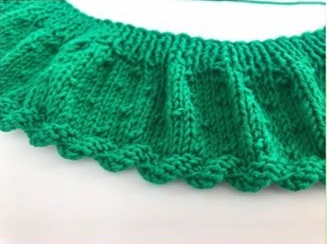
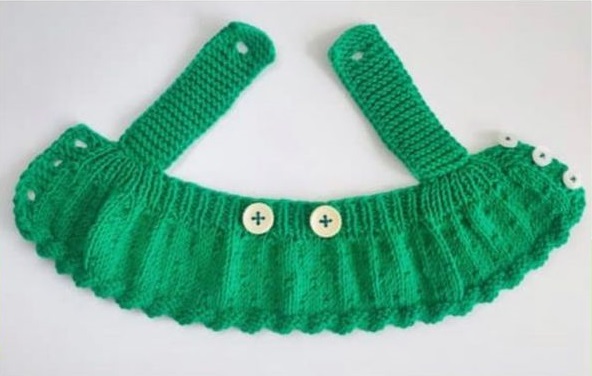
Using the cut thread and the big needle sew as show in the photo every 5 sts.
Tape (2 details)
Using the yarn B and 3.5mm needles, cast on 10 sts (8sts + 2 edge sts).
Edge sts: the first st is slip, the last st is purl.
Row 1-5: k8
Row 6: k3, to make the hole for the button: bind off k2, k3 (8sts on needles)
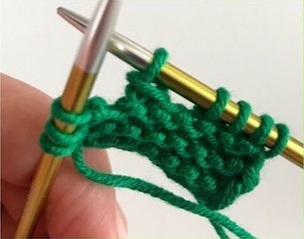
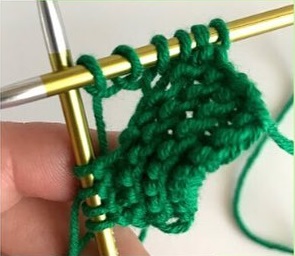
Row 7: k3, 2YO (show picture), k3 (10 sts on needles)
Row 8-42: k8
Row 43: bind off knit.
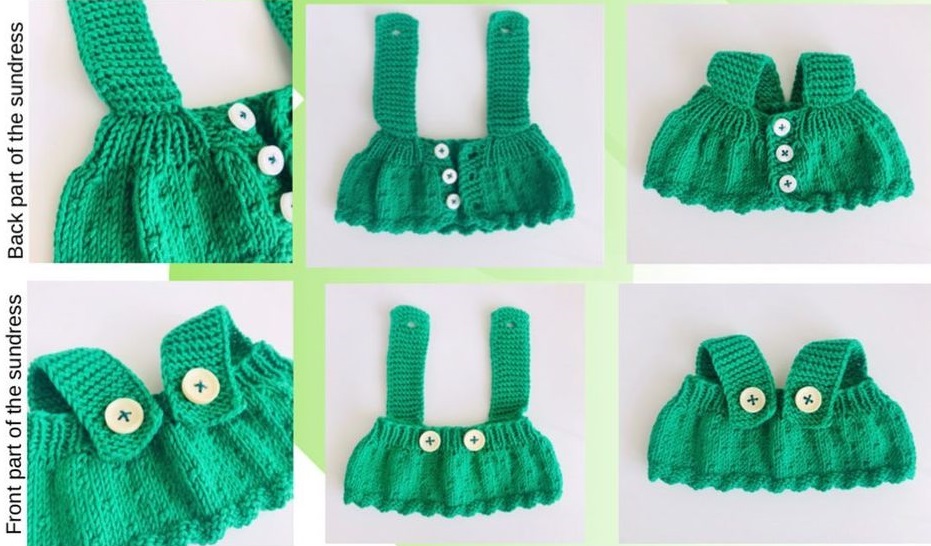
Sew the tapes with sundress and 3 small and 2 big buttons as show the pictures below.
