


Hello to everyone,
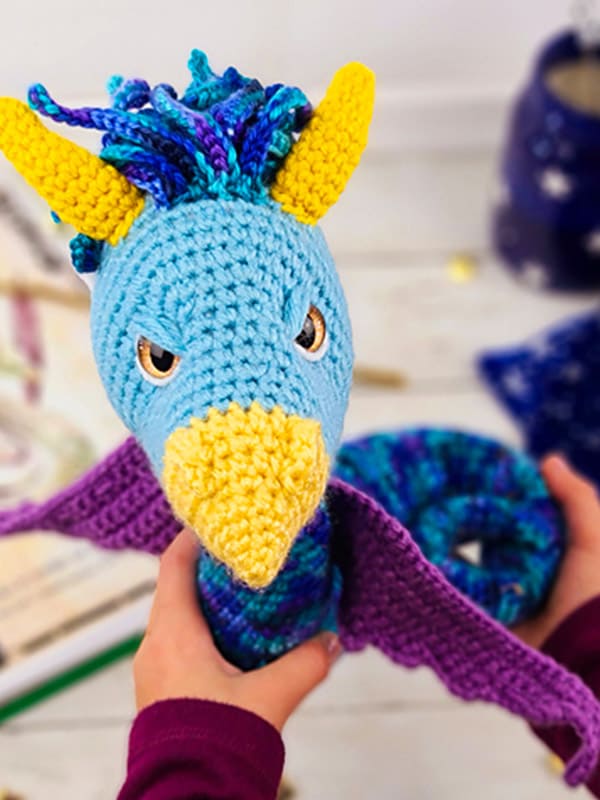
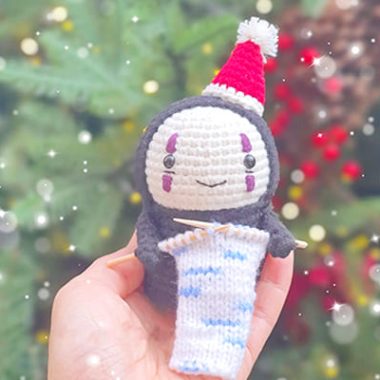
Those who watched the movie Fantastic Beasts have seen this character. Aggressively knit as in the movie. A tiny winged dragon amigurumi that only protects its loved ones. It can be the surprise of the new week and it can be a wonderful surprise for the little boy of your house.
PDF Baby Occamy Amigurumi Crochet Pattern
Baby Occamy amigurumi is a fantastic toy with snake look and wings.
His facial expression seems a little angry, it was tried to be the same as in this movie. Its wings are large and wide crochet in purple, and yellow color is preferred for the horns on its head. His wavy hair, located just behind his horns, suits the toy very well. After checking your material list, you should start making this cute toy right away.
Designer
Instagram: sweetoddityart
Ravelry: sweetoddityart
Pattern Details
Size: 10 inches from foot to top of head with weight 4 yarn and a 3.25 mm hook
Skill Level Needed: ADVANCED level crocheters, requires patience and precisions when assembling the occamy and basic crochet skills.
Materials Needed:
• Yarn: Worsted Weight #4, approximately 100g of main color, 50-75g of accent colors
• Color A: Yellow, Color B: Blue, Color C: variegated yarn, Color D: purple
• Hook Size: D Hook or 3.25 mm
• 18 mm dragon safety eyes(can be found at suncatchercrafteyes.com)
• Scissors, sewing needle, stitch marker, fiberfill stuffing
• Craft wire(optional)


Abbreviations:
mr= magic ring- crochet single crochet stitches in to the adjustable loop
BLO= back loops only
ch= chain stitch
F/O= Fasten off
sc= single crochet stitch
hdc= half double crochet
sl= slip stitch
hdc-dec= half double crochet decrease
dc= double crochet stitch
inc= increase- make two single crochet stitches in the same stitch
dec=decrease- crochet two stitches together using the decrease method
(4 sc, inc) x 6= repeat the pattern between parentheses 6 times
Notes:
• Do not join rounds unless stated, work in a continuous spiral
• Use a stitch marker to mark the beginning of each round
• All stitches are worked in both loops unless stated otherwise in the pattern
Head:
Crocheted from front of nose to back of head
Starting with Color A:
1. Make 4 sc into a magic ring= 4
2. (sc, inc) x 2= 6
3. (sc, inc) x 3= 9
4. (2 sc, inc) x 3= 12
5. 3 sc, 6 hdc, 3 sc= 12
6. (sc, inc) x 6= 18
7. 4 sc, 9 hdc, 5 sc= 18
8. (2 sc, inc) x 6= 24
9. 5 sc, 13 hdc, 6 sc= 24
Change to Color B:
10-11. sc in each st around
12. (3 sc, inc) x 6= 30
13-15. sc in each st around
16. Work only 6 sc in this round, leave the rest of the stitches unworked(you are moving the stitch marker to make a new starting point)
17. (2 sc, inc) x 6, 12 sc= 36
18. (3 sc, inc) x 6, 12 sc= 42
19. (4 sc, inc) x 6, 12 sc= 48
20-23. sc in each st around
Place eyes between rounds 17 and 18, leaving 16 holes between them. 1st eye is placed before the 2nd increase. Count 16 holes after the first eye and place the 2nd eye. If you want the sunken eye look, do not place the backs of the eyes on until row 26.
TIP! You may have to adjust the eye placement depending on yarn and hook size you use.
24. (2 sc, dec) x 2, 24 sc, (2 sc, dec) x 4= 42
25. (sc, dec) x 2, 24 sc, (sc, dec) x 4= 36
26. dec x 2, 24 sc, dec x 4= 30
Change to Color C:
Now for the eyes. Stuff the head well. Cut a long piece of yarn and remove the eyes. Place the needle in the hole where the first eye was and thread the needle into a hole next to the eye hole. Go back and forth between each eye hole repeating the process from the first eye. Pull slightly on the yarn after going through each hole. Do this about 3 times on each side until you reach the look you want. Follow the pictures for help. There is also a youtube video I have for extra help on this process.
To place the backs of the eyes you will need to remove most of the stuffing to place the washers on the eyes then re stuff it.
27. sc in each st around
28. (3 sc, dec) x 6= 24
29. (2 sc, dec) x 6= 18
30. (sc, dec) x 6= 12
31. Dec x 6= 6
F/O and sew the hole closed


Body:
With Color C:
*TIP! For the slip stitches on rounds 75-77 and 79-81, you will want to make them a bit looser, it will be very hard to sl st into a sl st that is very tight!
1. Make 4 sc into a magic ring= 4
2-4. sc in each st around
5. (sc, inc) x 2= 6
6-9. sc in each st around
10. (inc, 2 sc) x 2= 8
11-15. sc in each st around
16. (inc, 3 sc) x 2= 10
17-19. sc in each st around
20. (inc, 4 sc) x 2= 12
21-23. sc in each st around
24. (inc, 5 sc) x 2= 14
25-26. sc in each st around
27. (inc, 6 sc) x 2= 16
Stuff the body as you work
The tip of the tail will be hard to stuff, I left that part unstuffed.
28-29. sc in each st around
30. (inc, 7 sc) x 2= 18
31-32. sc in each st around
33. (inc, 8 sc) x 2= 20
34-35. sc in each st around
36. (inc, 9 sc) x 2= 22
37-38. sc in each st around
39. (inc, 10 sc) x 2= 24
40-41. sc in each st around
42. (inc, 11 sc) x 2= 26
43-44. sc in each st around
45. (inc, 12 sc) x 2= 28
46-47. sc in each st around
48. (inc, 13 sc) x 2= 30
49-51. sc in each st around
52. (inc, 14 sc) x 2= 32
53-55. sc in each st around
56. (inc, 15 sc) x 2= 34
57-59. sc in each st around
60. (inc, 16 sc) x 2= 36
61-63. sc in each st around
64. Work 12 hdc only!
65. Ch 1, turn, hdc-dec, 8 hdc, hdc-dec= 10
66. Ch 1, turn, hdc-dec, 6 hdc, hdc-dec= 8
67. Ch 1, turn, hdc-dec, 4 hdc, hdc-dec= 6
68. Turn, work 6 sc across the top, 3 down the side of the rows, 24 across the front, 3 up the side to starting point= 36
69-70. Sc in each st around
71. (dec, 16 sc) x 2= 34
72-73. Sc in each st around
74. (dec, 15 sc) x 2= 32
75-77. 11 hdc, 16 sl, 5 hdc
78. (dec, 14 sc) x 2= 30
79-81. 10 hdc, 15 sl, 5 hdc
82. (dec, 13 sc) x 2= 28
83-84. Sc in each st around
85-86. 9 hdc, 14 sc, 5 hdc
87-88. Sc in each st around
89. (dec, 12 sc) x 2= 26
90-93. Sc in each st around
94. (dec, 11 sc) x 2= 24
Stop working for a minute. If you want the curly tail look you will need to add the wire now. Follow the pictures and instructions on the next page.
95-98. Sc in each st around
99. (dec, 6 sc) x 3= 21
100-101. Sc in each st around
102. (dec, 5 sc) x 3= 18
F/O and leave a long tail for sewing
Look on next page for pictures of the next few rounds
This is what rounds 64-68 will look like.

For the wire. Cut a very, very long strand of wire. Approximately 5 feet of wire. You may need less or more. I did not have exact estimates. Fold the wire in half and twist the wire. Fold the wire in half again and twist it. Wrap some tape around the edges of the wire to keep it from poking out. Insert the wire into the body all the way down to the tip. You will need to navigate the wire into the body around the stuffing. I have worked with a lot of wire projects so you will have to really figure out how to get the wire around the stuffing. It took me a couple tries to get the wire in the body but I also have lots of practice with wire. Continue working the body. Cut off any excess wire and re tape it if needed. Then curl the tail once you are finished. Shape it how you want it.

Horns(Make 2):
With Color A:
1. Make 4 sc into a magic ring= 4
2. Sc in each st around
3. (sc, inc) x 2= 6
4-5. sc in each st around
6. (2 sc, inc) x 2= 8
7-12. sc in each st around
I did not stuff my horns
F/O and leave a long tail for sewing
Wings(Make 2):
With Color D:
Ch 10
1. sc in 2nd ch from hook, 7 sc, sl in last ch= 9
2. turn, ch 1, 8 sc, ch 4
3. turn, sc in 2nd ch from hook, sc in next 2 chains, 3 sc, inc, 3 sc, sl= 12
4. turn, ch 1, 4 sc, inc, 7 sc, ch 5
5. turn, sc in 2nd ch from hook, sc in next 3 chains, 6 sc, inc, 5 sc, sl= 18
6. turn, ch 1, 5 sc, inc, 12 sc, ch 6
7. turn, sc in 2nd ch from hook, sc in next 4 chains, 12 sc, inc, 5 sc, sl= 25
8. turn, ch 1, 6 sc, inc, 18 sc, ch 7
9. turn, sc in 2nd ch from hook, sc in next 5 chains, 18 sc, inc, 6 sc, sl
10. turn, ch 1, 7 sc, inc
F/O and leave a long tail for sewing
Hair:
You will be waiting until you sew on the horns to do the hair!
With Color C:
Attach hair to the round in front of the horns with a sl
1. Ch 18, sl in 2nd ch from hook and across= 17
Sl in the next stitch. Do not fasten off! Start another chain!
You are going to be working 5 strands of these across the head in a row.
Follow the pictures below to see how it looks. You will be turning to create a new row behind the first row. Do this for ever row number
2. Ch 18, sl in 2nd ch from hook and across
Repeat 6 more times
3. Ch 18, sl in 2nd ch from hook and across
Repeat for 6 more times
4. Ch 18, sl in 2nd ch from hook and across
Repeat 4 more times
5. Ch 18, sl in 2nd ch from hook and across
Repeat 4 more times
6. Ch 15, sl in 2nd ch from hook and across
Repeat 4 more times
7. Ch 15, sl in 2nd ch from hook and across
Repeat 3 more times
8. Ch 15, sl in 2nd ch from hook and across
Repeat 3 more times
9. Ch 12, sl in 2nd ch from hook and across
Repeat 2 more times
10. Ch 12, sl in 2nd ch from hook and across
Repeat 2 more times
11. Ch 12, sl in 2nd ch from hook and across
Repeat 1 more time
12. Ch 12, sl in 2nd ch from hook and across
Repeat 1 more time
13. Ch 12, sl in 2nd ch from hook and across
F/O and weave in the tail ends.

Assembly
Head and Body:
1. Thread your needle with a long strand of blue yarn. Insert the needle into a hole in between the eyes. Bring the needle to a lower corner of the eye. Bring the needle to an upper corner of the eye. Repeat this 2 more times. Repeat for the opposite eye.
2. Pin horns between rounds 20- 22. Sew the horns onto the head.
3. Now go back and do the hair or spikes on the head.
4. Thread your needle with a long strand of black yarn. Insert the needle into a hole on the head. Bring the needle up to round 8 and embroider a little black nostril. Repeat for the 2nd nostril.
5. Attach the yellow yarn to the side of the black nostril. You are working around the black part. Sc in the same st, work a hdc in the next, dc in the next, hdc in the next st, sc in the next st. F/O and weave in the ends.
6. Thread your needle with a long strand of white yarn. Insert the needle into a hole on the head and bring the needle up to a corner underneath the eyebrow. Bring the needle around the eye to the top corner. Repeat for the 2nd eye.
7. Pin the body to the head and sew the head onto the body.


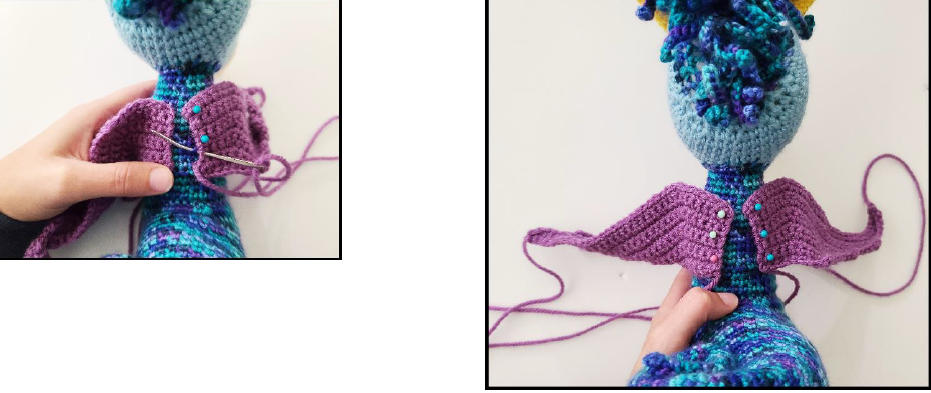
Wings:
1. Pin the wings onto the back of the body.
2. Sew the wings onto the body.
Helpful Tips:
Exact Colors and Brand of Yarn Used:
1. Yellow: Red Heart Cornflower
2. Blue: Red Heart Aqua
3. Variegated yarn: Loops and Threads Soft and Shiny Vibrant Sea
4. Purple: I love this yarn Amethyst
You can use different eye and nose sizes. You might have to adjust the placements if you change the sizes.
You can use different hook sizes and weights of yarn. It will just change the size of your occamy and you might need to adjust eye and nose placement.
How you stuff matters! The type of stuffing you use, how you stuff, all this matters on how your occamy turns out. I prefer Polyfil stuffing but you can use other types.
