


Hi everyone,
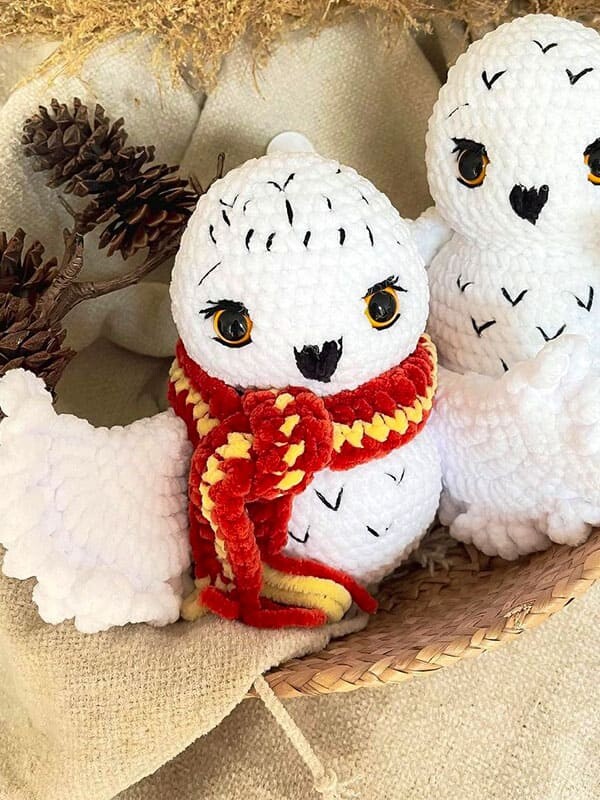
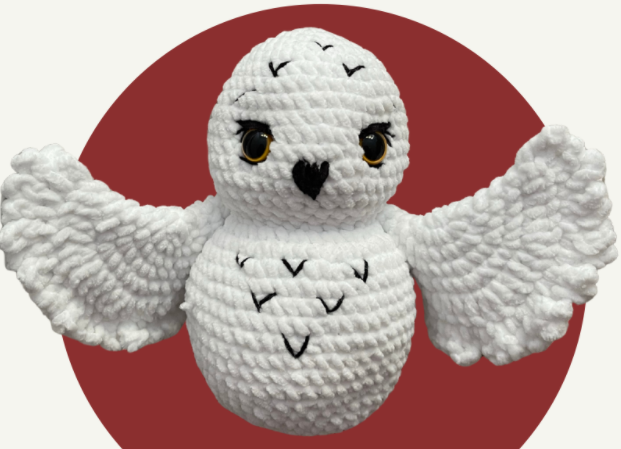
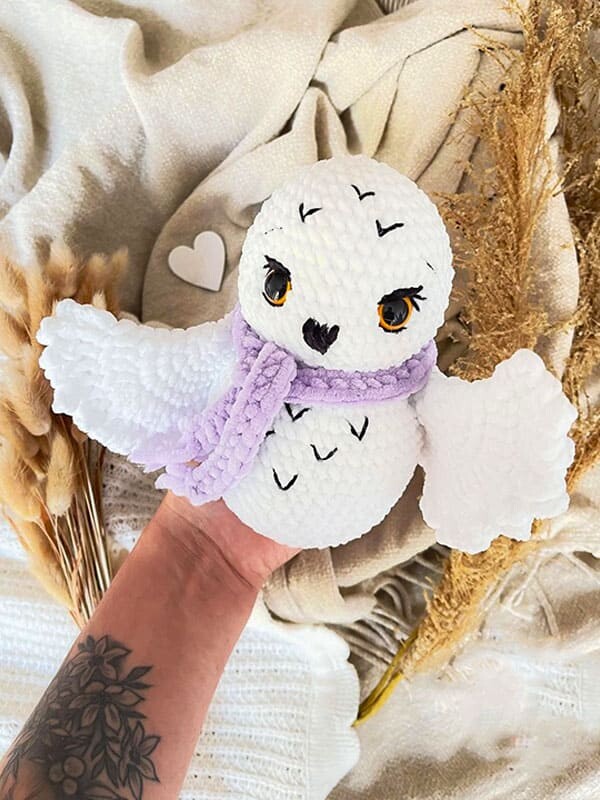
I shared the amigurumi pattern of Hedwig, the most beloved owl from the Harry Potter movies, for you. The amigurumi owl pattern is very easy to do step by step. Thanks to the creator of the pattern. You can get the Hedwig Owl Amigurumi pattern for Halloween right away. You can crochet for your children and loved ones and give them a surprise gift. You can use the Hedwig owl amigurumi pattern to decorate by making a Harry Potter corner in your home.
The Amigurumi Hedwig pattern is very easy to make. We begin to weave from the wings. Let’s complete the wings with white thread. Then we will sew it to the body part. We crochet the head and the body part of the Amigurumi owl pattern together. You can crochet the black lines at the beginning and the body part of the owl amigurumi pattern after completing the pattern. You can make the eyes of the amigurumi owl pattern using plastic accessories. If desired, you can crochet with black yarn. You can crochet a Hogwarts owl hedwig amigurumi scarf. You can change the color of the crochet scarf as you wish. Don’t forget to add the amigurumi owl pattern to your favorites list.
PDF Christmas Crochet Snowy Owl Amigurumi Free Pattern
Designer
Instagram: inami_haekelzauber
Materials
Chenille wool (e.g. Durable Velvet, Himalaya Dolphin Baby) in white safety eyes 15mm (Chenille), 10mm (Cotton) black cotton for the eye border and the pattern on the head and belly of the owl
Katia Velvet Fine for embroidering the beak
Hook 3mm (Chenille), 2.5mm (Cotton)
Scissors
Blunt needle
Stitch marker
Pins
Fiberfilll or Cotton (e.g. Sheepjes Catona, Rico Baby Dream dk) in white
Abbreviations:
MR – Magic Ring
Rd – Round
R – Row
sc – single crochet
ch – chain
sl st – slip stitch
inc – increase
dec – decrease
hdc – half double crochet
dc – double crochet
dc inc – two double crochet in one st
Let’s start crocheting the amigurumi owl hedwig pattern. 🙂
Wings (2x):
Rd1: 5sc in MR (5)
Rd2: (inc) x5 (10)
Rd3: (inc) x10 (20)
Rd4: (1sc, inc) x10 (30)
Rd5: (2sc, inc) x10 (40)
Rd6: (3sc, inc) x10 (50)
Rd7: (4dc,, dc inc) x10 (60)
Fold the wing in half and crochet as follows to close it: (5ch, 1 sc) x 22, crochet the last 8 stitches in sc only.
Fasten off, leaving a long yarn to sew the wings on the body later.
(You can also sew them on with a cotton yarn of the same color, so that they hold better, then sew the chenille yarn).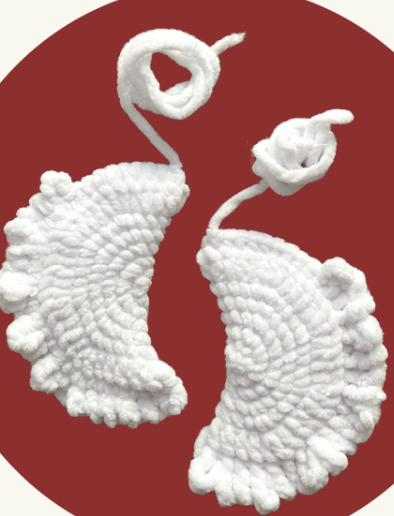
After completing the wings of the amigurumi hedwig pattern, crochet the body and the head part. White yarn is preferred. You can change the thread color if you want. Light blue or lilac yarn will look good. 🙂
Head and Body
Start with the Head:
Rd1: 6sc in MR (6)
Rd2: (inc) x6 (12)
Rd3: (1sc, inc) x6 (18)
Rd4: (2sc, inc) x6 (24)
Rd5: (3sc, inc) x6 (30)
Rd6: (4sc, inc) x6 (36)
Rd7: 36sc (36)
Rd8: (5sc, inc) x6 (42)
Rd9: 42sc (42)
Rd10: (6sc, inc) x6 (48)
Rd11-14: 48sc (4 rounds) (48)
Rd15: (6sc, dec) x6 (42)
Rd16: 42sc (42)
Rd17: (5sc, dec) x6 (36)
Rd18: (2sc, dec) x9 (27)
Rd19: (7sc, dec) x3 (24)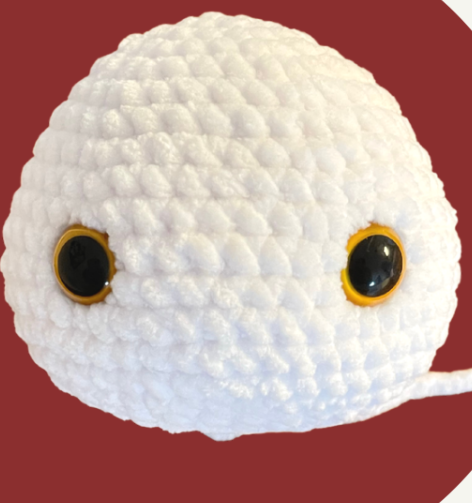
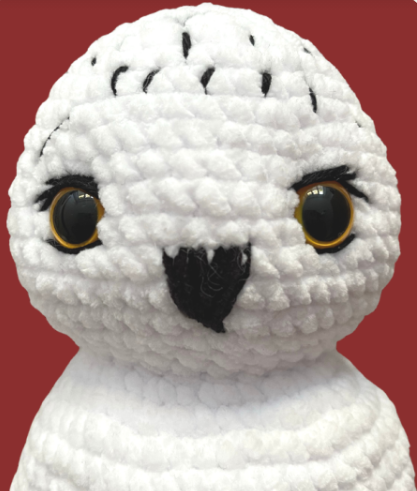
Attach the safety eyes between Rd11/12 with a distance of 7 visible stitches (the stitch marker‘s position is in the middle of the backside of the head) I have deepened the eyes. Stuff the head firmly with fiberfill. I prefer to stuff the sides of the head a little bit more to form cheeks. Try to shape the head while stuffing.
ATTENTION: Do not cut the yarn yet, we will continue with the body on the next page.
Continue with the body:
Rd20: (3sc, inc) x6 (30)
Rd21: (1sc, inc) x15 (45)
Rd22: 3sc, (5sc, inc)x7 (52)
Rd23: inc, 50sc, inc (54)
Rd24-28: 54sc (5 rounds) (54)
Rd29: (7sc, dec) x6 (48)
Rd30: 48sc (48)
Rd31: (6sc, dec) x6 (42)
Rd32: 42sc (42)
Rd34: (5sc, dec) x6 (36)
Rd34: (4sc, dec) x6 (30)
Rd35: (3sc, dec) x6 (24)
Rd36: (2sc, dec) x6 (18)
Rd37: (1sc, dec) x6 (12)
Rd38: (dec) x6 (6)
Stuff the body firmly with fiberfill, you can start after Rd34.
Cut the yarn, use a blunt needle and pull it through the 6 remaining stitches to close the hole.
Sew the yarn and hide the end inside the body.
We crochet the black lines at the beginning and the part of the body of the amigurumi pattern. 🙂
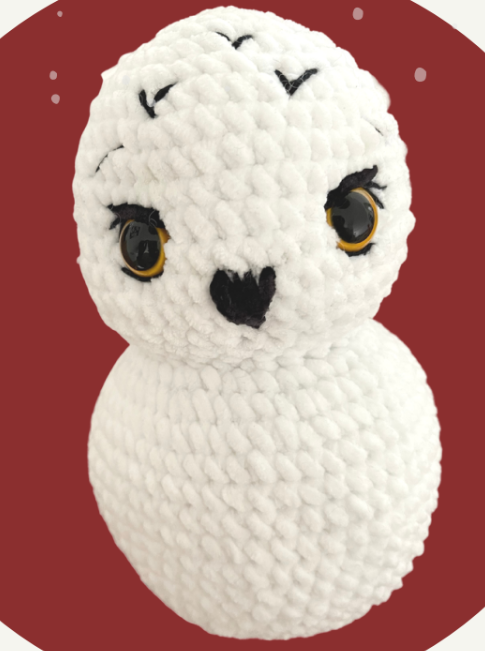
Completion of the head:
Take a black cotton yarn and embroider the eyelashes, the lower eye rim and the eyebrows. You can embroider the pattern on the head of the owl with short lines or small “V’s”. You are free here in the design of your owl.
I embroidered the beak with black velvet yarn, but you can also use regular cotton. It starts in the center at the same height as the eye rim, is 3sc wide and has 2sc distance to the eye on each side. Embroider a triangle and fill it out, finally embroider a beak tip.
Completion of the body:
You can embroider on the belly of the owl (identical to the head before) small “V’s” with black cotton yarn.
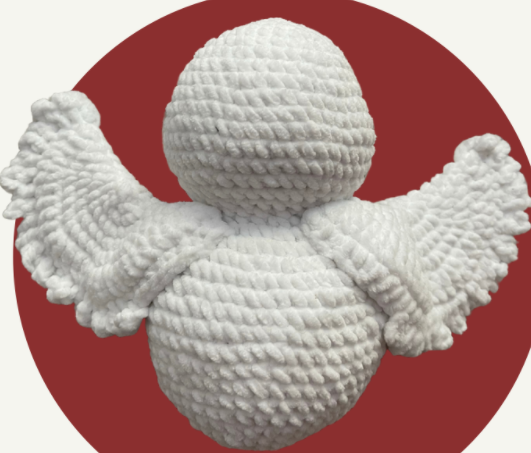
Sew the wings, left and right to the back of the owl. I have fixed the wings also on the side of the belly.
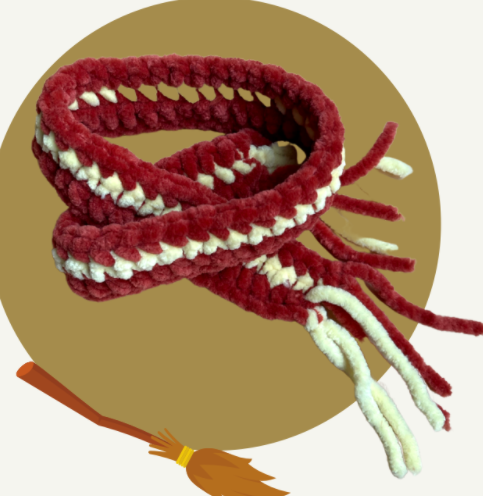
Let’s crochet the hedwig owl amigurumi pattern scarf 🙂
Scarf:
Start with red color
R1: Ch71
R2: Crochet on the chain: hdc into the 2nd ch from the hook, 69hdc, ch2, turn
Color change to yellow
R3: 70sc, ch2, turn
Color change to red
R4: 70sc
Finish and close your work invisibly. Cut equal pieces of yarn and add them at each end of the scarf creating a tassle. Cut off the excess yarn.
Congratulations, you have completed the amigurumi owl hedwig pattern. 🙂
Download PDF Pattern

bonjour j aimerais faire la chouette edwin mais les explications sont un peu difficile a comprendre est ce que vs pouvez simplifier voici un exemple (6 sc,inc)x6(48),j habite au quebec et nous ce n est pas du tout pareil la marche a suivre,nous ce serait faire 5 mailles serresur les mailles suivantes et 2 mailles serrees dans la sixieme repete jusqua la fin du rang ,pour vous est ce possible de me traduire le patron ainsi .