


Dear friends. Hello to everyone!
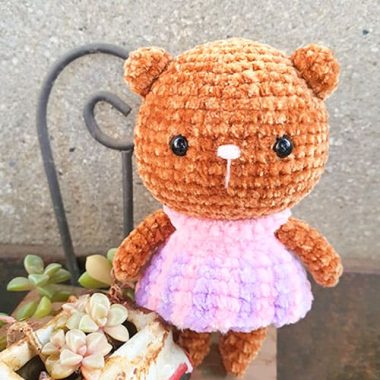
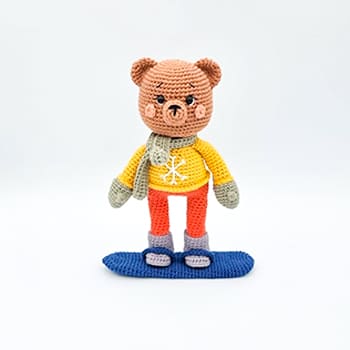
Friends, today I will share a very cute crochet teddy bear pattern. First of all, thank you very much to “didy_toys.eng” for this cute amigurumi teddy bear design. A very simple and showy plush crochet teddy bear amigurumi pattern. You will also see how easy it is to mold. Now let’s talk about this amigurumi pattern.
This cute crochet teddy bear can be a difficult choice for beginners. However, as Lovelycraft, it has a very easy structure according to our patterns. 3 colors are recommended for this cute amigurumi teddy bear. The most prominent colors are, of course, the nose and mouth. Using decisive colors in these parts will make the amigurumi look more beautiful. Let’s take you step by step pattern instructions to make such a beautiful and plush amigurumi teddy bear for your children.
Cute Crochet Teddy Bear Amigurumi Toy Free Pattern
Designer: didy_toys.eng
Materials & Tools
•Himalaya dolphin baby yarn of the main colour (1 skein)
•Alize softy plus yarn of the additional colour for the muzzle and feet
•4mm crochet hook
•Black or brown thread for face decoration
•14mm safety eyes
•20*15mm safety nose
•Fiberfill
•Long needle for sculpting the muzzle
•Needle for plush yarn


Abbreviations
•sc– single crochet
•st– stitch
•inc– increase
•dec– decrease
•ch– chain stitch
•F/O– fasten off
Head & Body
Use the main colour
1. 6sc into magic ring- 6
2. 6inc- 12
3. (sc,inc)x6- 18
4. (2sc,inc)x6- 24
5. (3sc,inc)x6- 30
6. (4sc,inc)x6- 36
7. (5sc,inc)x6- 42
8-10. sc in each st around- 42
11. (5sc,dec)x6- 36
12. (4sc,dec)x6- 30
13. (3sc,dec)x6- 24 (insert the eyes between 9 and 10 rows)
14. (2sc,dec)x6- 18
15. (sc,dec)x6 -12
Here starts the body;
16. sc in each st around- 12
17. (sc,inc)x6- 18
18. (2sc,inc)x6- 24
19. 8sc,8inc,8sc- 32
20. 8sc,dec,12sc,dec,8sc- 30
21. sc in each st around- 30
22. (3sc,dec)x6- 24
23. sc in each st around- 24
24. (2sc,dec)x6- 18
25. sc in each st around- 18
26. (sc,dec)x6- 12
25. 6dec-6 F/O and hide the thread

Arms (make 2)
1. 6sc into magic ring- 6
2. 6inc- 12
3. (sc,inc)x6- 18
4-5. sc in each st around- 18
6. 3sc, 6dec, 3sc- 12
7-11. sc in each st around- 12
Fold and sew the edges together.
F/O leaving a tail for sewing

Legs (make 2)
Use the additional yarn
1. 5ch, in the second ch from the hook: inc, 2sc, 4sc in one st, 2sc, inc- 12
2. 2inc, 2sc, 4inc, 4inc, 2nsc- 20
3. (sc,inc)x2, 2sc, (sc,inc)x4, 2sc, (sc,inc)x2- 28
Change the thread to the main
4. sc in each st around through the back loop- 28
5. sc in each st around- 28
6. 8sc, 6dec, 8sc- 22
7. 8sc, 3dec, 8sc- 19
8. 6sc, dec, one sc in 3st, dec, 6sc- 15
9-15 (7 rows). sc in each around- 15
Fold and sew the edges together. F/O leaving a tail for sewing.

Ears (make 2)
1. 6sc into magic ring- 6
2. 6inc- 12
3. 3sc in one st, 5sc, 3sc in one st, 5sc- 16
4. one sc in 3st, fold and sew the edges together. F/O leaving a tail for sewing.

Muzzle (use additional colour)
1. 6sc into magic ring- 6
2. 6inc- 12
3. (sc,inc)x6- 18
4. (2sc,inc)x6- 24
5. sc in each st around- 24
F/O leaving a tail for sewing. Insert the nose between 3 and 4 rows.
Tail
1. 6sc into magic ring- 6
2. 6inc- 12
3. sc in each st around- 12

Assembly & Design
• Sew the arms, legs and tail to the body
• Sew the ears and the muzzle to the head
• Sculpt the face (for a video tutorial go to: @didy_toys.eng)
• Embroider a line in the middle of the muzzle
• Decorate your bear with a bow, sewing it to the neck.
Congratulations! Your plush bear is ready..
Download PDF Pattern

