


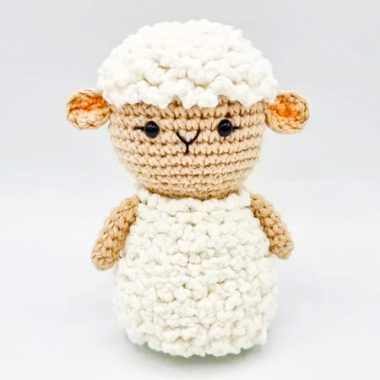
Hi everyone,
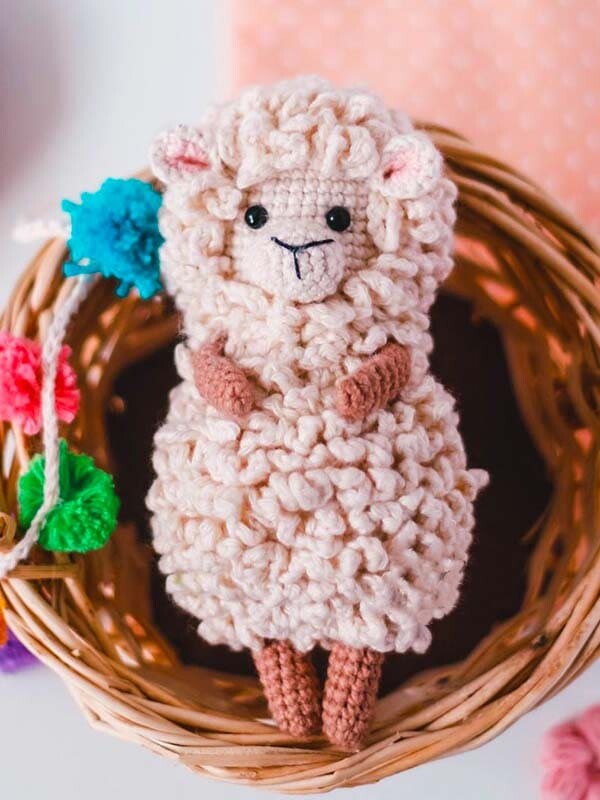
I shared the cute little crochet sheep amigurumi pattern. It is very easy to make the free pattern step by step. Thanks to the creator of the pattern. You can crochet the amigurumi sheep pattern for your loved ones. You can give them a surprise gift. You can crochet amigurumi sheep pattern for Christmas. You can make accessories from red hats and scarves for the New Year. You can use it to decorate your home and office. It will look great in your library. You can make different little sheep using different colors of yarn.
The Ita Sheep amigurumi pattern is very easy to make. You can make it with yarn that you don’t use at home. You should pay attention that the thickness of the yarn should be the same. The body and head of the amigurumi sheep pattern are crocheted. The arms and legs of the Amigurumi sheep pattern are crocheted with brown yarn. You can crochet curly wool with white yarn. You can make the eyes of the amigurumi toy using plastic accessories. You can crochet with black yarn if you want. You can crochet the part of the nose with black yarn. Don’t forget to add the amigurumi Ita sheep pattern to your favorites list.
PDF Little Crochet Sheep Ita Amigurumi Free Pattern
Designer
Instagram: laranha.handmade
Materials
• Cotton yarn colors: bone or white and brown.
• 4mm safety eyes (optional)
• 2.00mm crochet.
• Nappa or synthetic cotton.
• Wool needle.
• Pair of scissors.
• Score marker.
Abbreviations
MR: Amigurumi Magic ring
sc : Single Crochet
inc : Increase
dec : Decrease
trc : Triple Crochet/ Treble Crochet
st: Stitch
dc : Double Crochet
hdc: Half Double Crochet
slst : Slip Stitch
ch : Chain
..in : make increase into same stitch as many as the number which is given in front of “inc” abbreviation (exp; 3inc, 4inc..).
FLO : Crochet into front loops only
BLO : Crochet into back loops only
Let’s start crocheting the amigurumi sheep pattern. 🙂
Body
The body and head of the sheep are woven in one piece, fill in the legs as you crochet, I prefer to fill the rest after crocheting the wool, but you can fill it before if you prefer.
First leg:
With brown color yarn:
Rnd 1. 6 sc in MR (6)
Rnd 2. (1 sc, 1 inc) x 3 (9)
Rnd 3-10. 9 sc (9) (8 rounds)
Cut the yarn leaving a small strand that you will later lose when you join the legs.
Second leg and body:
Crochet the second leg the same as the first, but before crocheting the last stitch, change it to cream or white. Then ch 3 and join it to the first leg.
With off-white or white color.
Rnd 11. (3 sc, 1 inc) x 6 (30)
Rnd 12. BLO (4 sc, 1 inc) x 6 (36)
Rnd 13. (5 sc, 1 inc) x 6 (42)
Rnd 14. BLO (6 sc, 1 inc) x 6 (48)
Rnd 15. (7 sc, 1 inc) x 6 (54)
Rnd 16. BLO 54 sc (54)
Rnd 17. 54 (54)
As you will see, the whole body is woven by inserting one rounds in BLO and another taking the normal stitch, this to leave FLO exposed where we will weave the wool.
Rnd 18-24. 54 sc (5) (7 rounds)
Interleaving BLO and normal rounds.
Rnd 25. (7 sc, 1 dec) x 6 (48)
Rnd 26. BLO 48 sc (48)
Rnd 27. (6 sc, 1 dism) x 6 (42)
Rnd 28. BLO 42 sc (42)
Rnd 29. (5 sc, 1 dism) x 6 (36)
Rnd 30. BLO 36 sc (36)
Rnd 31. (4 sc, 1 dism) x 6 (30)
Rnd 32. BLO 30 sc (30)
Rnd 33-36. 30 sc (30) (4 rounds Interleaving rounds normal and in BLO)
Rnd 37. (2 sc, 1 aum) x 10 (40)
Rnd 38. BLO 40 sc (40)
Rnd 39. 40 sc (40)
From this round on, continue with the sequence of one rounds per BLO and another normal with the exception of the part where the face of the sheep will go, that part will be crocheted ALL rounds by taking the normal stitch. Make sure the face is centered, if you need to crochet more or less stitches in BLO so that the stitches on the face are centered just do it, all rounds have 40 stitches.
Rnd 40. BLO 11 sc, 10 sc, BLO 19 sc (40)
Rnd 41. 40 sc (40)
Rnd 42. BLO 10 sc, 12 sc, BLO 18 sc (40)
Rnd 43. 40 sc (40)
Place the safety eyes between rounds 43 and 44 with 5 sc apart well centered.
Rnd 44. BLO 10 sc, 12 sc, BLO 18 sc (40)
Rnd 45. 40 sc (40)
Rnd 46. BLO 11 sc, 10 sc, BLO 19 sc (40)
Rnd 47. 40 sc (40)
Rnd 48. BLO (8 sc, 1 dec) x 4 (36)
Rnd 49. (4 sc, 1 dec) x 6 (30)
Rnd 50. BLO (3 sc, 1 dec) x 6 (24)
Fill the body, it is much more comfortable to crochet the hair without it being filled, I recommend that you leave this part on hold and start crocheting the wool of the sheep that is explained on the next page.
Rnd 51. (2 sc, 1 dec) x 6 (18)
Rnd 52. BLO (1 sc, 1 dec) x 6 (12)
Rnd 53. 6 dec (6)
Close with needle by FLO cuts the yarn and hides the strand. She finishes weaving her hair.
We have completed the body part of the amigurumi pattern. Now we crochet your curly wool.:)
Sheep wool
I recommend you crochet the wool when the body is not yet filled, leave the body closure on hold and start crocheting this part. Hook cream yarn or whatever you want in the first FLO of Round 12 that You left exposed, here you will begin to crochet the wool of the sheep from right to left (if you are left-handed in the
you normally crochet) Crochet: 5 ch, 1 sc in the next available FLO, again pick up 5 ch. You will only vary the amount of ch in the part of the tail, to do this identify where you want it to be with point markers, only there you will crochet 12 ch, I crochet the tail on rounds 14 and 16 in only 5 FLO of the rounds, or That is, it was 10 times that I gave you 12cd for the tail. When you get to the head crochet: 8 ch, 1 sc in the next available FLO, again pick up 8 ch. In this part we leave the face free, so there will be two moments in which you have to turn the sheep upside down to be able to weave. MAKE SURE YOU GO THROUGH ALL THE FLO, if your yarn runs out, no problem, you can add more and then hide the yarns. You can also incorporate yarns of various colors, or weave larger chains to make the sheep fluffier, this part is fun because we can play with the pattern. When you finish, cut the yarn and hide the excess strands. On the next page, some photos;

We crochet the arms of the Amigurumi sheep pattern. 🙂
Arms
Make two the same. With brown color yarn:
Rnd 1. 6 sc in MR (6)
Rnd 2. (2 sc, 1 inc) x 2 (8)
Rnd 3-10. 8 sc (8) (8 rounds)
Cut the yarn leaving a long strand to sew to the body. Sew to the sides in rounds 33 and 34. You can articulate the arms through galvanized wire, if you do not articulate them, fill them in a bit before sewing.

We crochet the nose and ears of the Amigurumi sheep pattern. 🙂
Nose
With cream color yarn:
Rnd 1. 6 sc in MR (6)
Rnd 2. 6 inc (12)
Rnd 3. (1 sc, 1 inc) x 6 (18)
Rnd 4-5. 18 sc (18) (2 rounds)
Cut the yarn leaving a strand long enough to sew the arms to the body. Fill in a little, sew this piece the 38 rounds up. With black embroider the nose once sewn so that it is straight.

Ears
The ears are made up of two pieces, a pink piece and a white piece, you must have two of each.
First piece (make two the same)
With pink color yarn:
Rnd 1. 6 sc in MR (6)
Rnd 2. 6 inc (12)

Cut the yarn leaving a small strand that you will lose when joining this piece with the white piece.
Second piece (make two the same)
With white or bone color weave:
Rnd 1. 6 sc in MR (6)
Rnd 2. 6 inc (12)

Don’t cut the yarn, it’s time to join the second piece with the first. Put the pink piece behind the white piece and crochet taking the stitches from both the white piece and the pink piece. You are weaving with bone or white yarn, hide the excess pink yarn as you crochet.
Rnd 3. (1 sc, 1 inc) x 6 (18)
Cut the yarn leaving a long strand to sew the ears together. First fold the ear and give a few stitches to shape them.
Congratulations, you have completed the Ita Amigurumi Sheep. 🙂
Download PDF Pattern

