


Hello everyone,
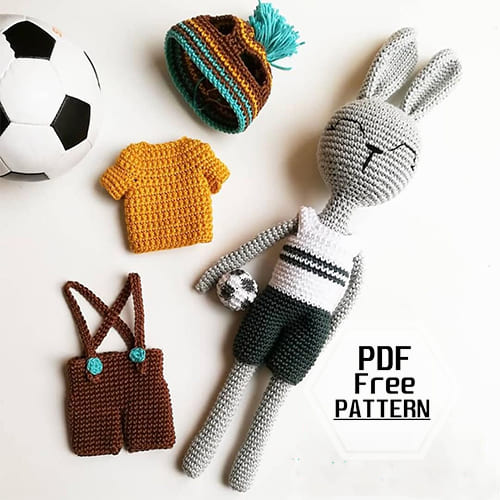
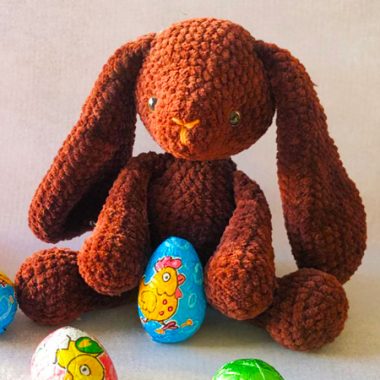
Today I shared the amigurumi ceiling pattern that she loves to make spots for you. It is very easy to crochet the free amigurumi bunny pattern step by step. The amigurumi bunny pattern will be very suitable for children who love sports. You can crochet an amigurumi pattern for your sports-loving friends. You can use the amigurumi bunny pattern for your home decoration. You can crochet the amigurumi bunny pattern for free in different colors. You can sew clothes with fabrics that you don’t use at home. Do not forget to add the free amigurumi bunny to your favorites list.
PDF Crochet Sport Bunny Amigurumi Free Pattern
Designer: poppycrochetdesign
Material
• Yarn: Catania- Schachenmayr (0172-gray, 0244- green, 0106-white)
• Fiberfill
• Thread for eyes
Hook size: 3,0 mm
Abbreviations
MR– magic ring
st(s)– stitch(es)
slst– slip stitch
ch– chain
sc– single crochet
dc– double crochet
inc– 2 single crochet in one stitch
inv-sc2tog – invisible decrease over 2 single crochet (Click the link to see how it’s done)
BLO– back loop only
Head + Body
Use the grey colour yarn. Work in a continous spiral. Mark the beginning of the lines with a piece of yarn (or stitchmarker).
Row 1. 6 sc in magic ring (6)
Row 2. (inc)*6 (12)
Row 3. (1sc, inc)*6 (18)
Row 4. 1sc, inc, (2sc, inc)*5, 1sc (24)
Row 5. (3sc, inc)*6 (30)
Row 6. 2sc, inc, (4sc, inc)*5, 2sc (36)
Row 7. (5sc, inc)*6 (42)
Row 8. 3sc, inc, (6sc, inc)*5, 3sc (48)
Row 9. (7sc, inc)*6 (54)
Row 10-16. 54 sc (54)
Row 17. (7sc, inv-sc2tog)*6 (48)
Row 18. 3sc, inv-sc2tog, (6sc, inv-sc2tog)*5, 3sc (42)
Row 19. (5sc, inv-sc2tog)*6 (36)
Row 20. 2sc, inv-sc2tog, (4sc, inv-sc2tog)*5, 2sc (30)
Row 21. (3sc, inv-sc2tog)*6 (24)
Row 22. 1sc, inv-sc2tog, (2sc, inv-sc2tog)*5, 1sc (18)
Row 23. (1sc, inv-sc2tog)*6 (12)
Row 24-26. 12sc (12)
Row 27. (5sc, inc)*2 (14)
Row 28. (6sc, inc)*2 (16)
Row 29. (3sc, inc)*4 (20)
Row 30-31. 20sc (20)
Row 32. (8sc, 2inc)*2 (24)
Row 33-34. 24 sc (24)
Row 35. (10sc, 2 inc)*2 (28)
Insert neck stiffener (see below) after filling the head with fiberfill.
Row 36-43. 28sc (28)
Row 44. (6sc, inv-sc2tog)*3, 4sc (24)
Row 45. 1sc, inv-sc2tog, (2sc, inv-sc2tog)*5, 1sc (18)
Row 46. (1sc, inv-sc2tog)*6 (12)
Row 47. (inv-sc2tog)*6 (6)
Neck Stiffener
Row 1. 6sc in MR (6)
Row 2. (2sc, inc)*2 (8)
Row 3-16. 8 sc (8)
Row 17. (inv-sc2tog)*4 (4)
This will be a tube-like shape, that needs to be inserted into the neck after the head is filled and most of the body part is already done. Do it as the leg, but it is just 14 Round “tall”. Must be filled very firmly- seeing the filling is not an issue at this point, it is a must. If it is done as written it will prevent the head from tilting backwards. Insert it into the neck after Row 35 – approximately half of it goes into the head and half of it stays in the body
Arm (x2)
Row 1. 6 sc in MR (6)
Row 2. (2sc, inc)*2 (8)
Row 3-27. 8sc (8)
Fill, close with 4 sc punching through 2 sc.
Leg (x2)
Row 1. 6 sc in MR (6)
Row 2. (inc)*6 (12)
Row 3-9. 12 sc (8)
Row 10. (4sc, inv-sc2tog)*2 (10)
Row 11-40. 10 sc (10)
Fill, close with 5 sc punching through 2 sc.
Ear (x2)
Row 1. 6 sc in magic ring (6)
Row 2. (inc)*6 (12)
Row 3. (1sc, inc)*6 (18)
Row 4. 1sc, inc, (2sc, inc)*5, 1sc (24)
Row 5-11. 24 sc (24)
Row 12. (10sc, inv-sc2tog)*2 (22)
Row 13. 22 sc (22)
Row 14. (9sc, inv-sc2tog)*2 (20)
Row 15. 20 sc (20)
Row 16. (8sc, inv-sc2tog)*2 (18)
Row 17. 18 sc (18)
Do not fill. Close with 8 sc punching through 2 sc.
Trousers + Shirt
(Green) Chain 20, connect it into a circle with a slst
Row 1. 20 sc into the chains
Row 2-8. 20 sc (20)
Do not cut the yarn of the 2nd leg
Row 9. Connect the 1st leg to the 2nd with a sc, do 19sc around the 1st leg then 20 sc around the 2nd leg.
Row 10-13. 40 sc (40)
Row 14. sc, inv-sc2tog, 18 sc, inv-sc2tog, 10 sc (38)
Row 15. 7sc, inv-sc2tog, 18sc, inv-sc2tog, 9sc (36)
Row 16. 36 sc (36)
Row 17(white). 36sc (36)
Row 18(white-BLO). 36sc (36)
Row 19-23. 36sc (36)
Row 24 (green). 36sc (36)
Row 25 (white). 36sc (36)
Row 26 (green). 36sc (36)
Row 27-28 (white). 36sc (36)
Row 29. 6sc, 10ch (skip 5st), 1sc into 6th st from hook, 11sc, 10 ch (skip 5st), 1sc into 6th st from hook, 6 sc, 1ch, turn back
From now on, do not do the continous spiral. Turn back at the end of each row. In this way we will get a V neck. It will be removable and the bunny can be dressed in another outfit.
Row 30 (go backward). 5sc, 10sc into chains, 12sc, 10sc into chains, 6sc, 1sc, turn
Row 31 (go backward). 4sc, inv-sc2tog, 8sc, inv-sc2tog, 9sc, inv-sc2tog, 8sc, inv-sc2tog, 5sc, 1ch, turn
Row 32 (go backward). 3sc, inv-sc2tog, 5sc, inv-sc2tog, 5sc, 2 inv-sc2tog, 5sc, 2 inv-sc2tog, 4sc, 1ch
Ball
If you make the ball orange, it can be a basketball. Or stick with the white and it can be volleyball, handball, even baseball or golf ball. It will be a simple sphere, and it’s detail will determine what kind of ball it is. I used textile pen to add the football/soccer ball details.
Row 1. 6 sc in magic ring ( 6 )
Row 2. (inc) * 6 (12)
Row 3. (1 sc, inc) * 6 (18)
Row 4. 1 sc ,inc, ( 2 sc, inc)*5, 1 sc (24)
Row 5-7. 24 sc (24)
Row 8. 1 sc, inv-sc2tog, (2sc, inv-sc2tog) *5, 1sc (18)
Row 9. (1 sc, inv-sc2tog) * 6 (12)
Row 10. (inv-sc2tog) * 6 (6)
Sew hole closed, cut the yarn, fasten off
Congratulations, you have completed the amigurumi bunny pattern. 🙂
