


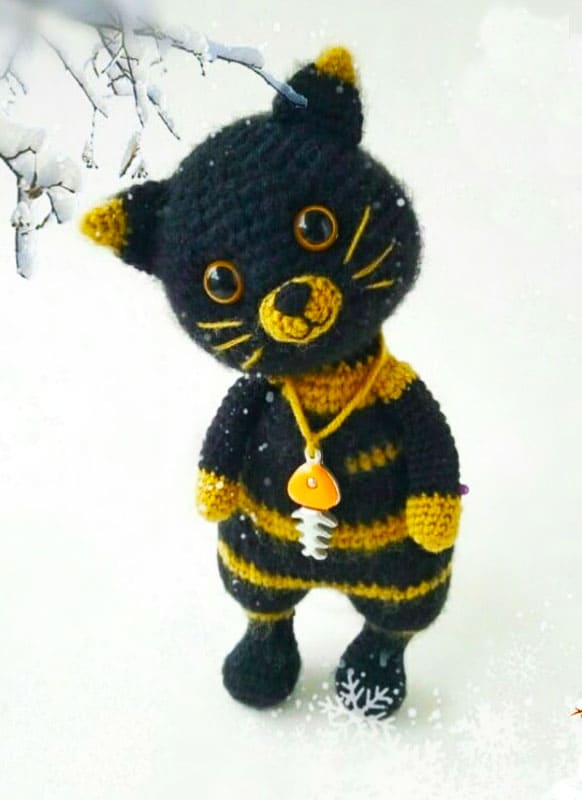
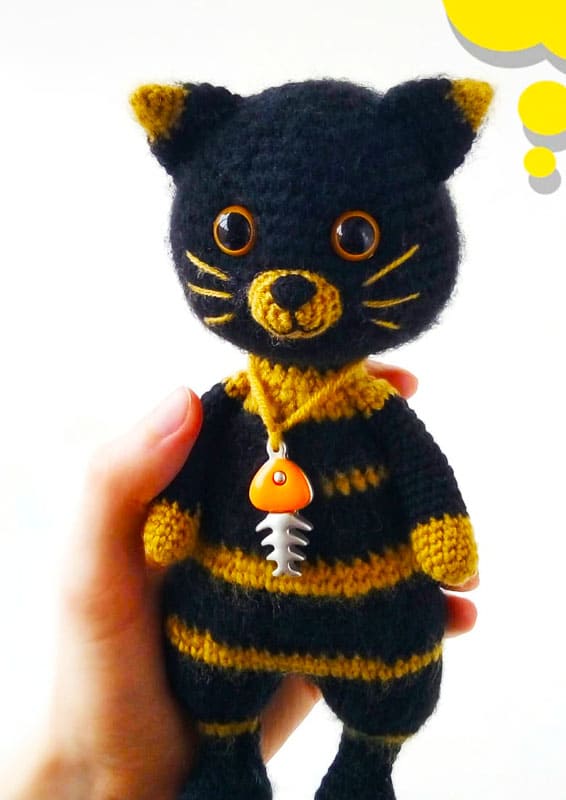
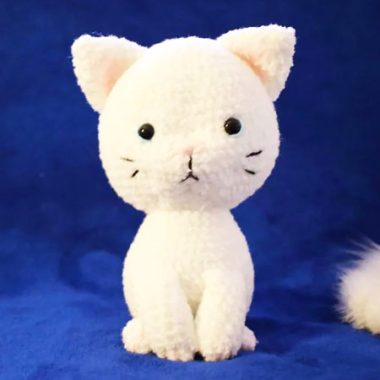
Hello dear friends. Today I will share a beautiful cat amigurumi pattern with you. The pattern is very easy to make. I tried to make a presentation as detailed as possible. There are a few points to consider when making the crochet cat pattern. The first of these is the brand of yarn you will use. Remember, one of the most important things when making an amigurumi is the quality of the yarn you use. In addition, the type of rope is incredibly decisive in the shape of the amigurumi you will make.
PDF Sylvester Crochet Cat Amigurumi Free Pattern
Black would be a good choice for color selection. However, I would prefer white color instead of yellow color. I think it is a very right choice to simply make the whiskers after making the crochet cat. Such small additions add a nice air to your work. We continue to share crochet animal amigurumi patterns for free and as pdf. Now let’s crochet the cat amigurumi step by step.
Designer: la_toys_
Materials
• Yarn (Pekhorka “Children’s volumetric”)
• Hook number 2
• Plastic eyes 10 mm
• Filler
You can take any yarn for crocheting cats.
The one you love or the one that is available.
If you do not want to crochet tabby seals, crochet a monochromatic one.
In the photo of the details, I have just such a one-color one.
If you decide to crochet a minke whale, then do not bother too much where to make which strip. Turn on your imagination and you will get your own unique CAT.
Abbreviations
MR: Amigurumi Magic ring
sc : Single Crochet
inc : Increase
dec : Decrease
tr : Triple Crochet/ Treble Crochet
st: Stitch
dc : Double Crochet
hdc: Half Double Crochet
slst : Slip Stitch
ch : Chain
..in : make increase into same stitch as many as the number which is given in front of “inc” abbreviation (exp; 3inc, 4inc..).
FLO : Crochet into front loops only
BLO : Crochet into back loops only
Lower legs and body
Left Foot
MAke 5ch and from the 2nd from the hook
1. 3sc, from loop 3 sc, 2sc, inc (10)
2. inc, 2sc, 3inc, 2sc, 2inc (16)
3. (sc, inc), 2sc, (sc, inc)*3, 2sc, (sc, inc)*2 (22)
4-5. (22 sc)
6. 5sc, 6dec, 7sc (17)
7. sc,dec, sc ,4dec, sc, dec, 2sc (11)
8-12. (11sc) 5 rows
13. (sc,inc)*5, sc (16)
14. (sc,inc)*8 (24)
15. (24)
16. 20sc(do not tie 4st),slst.
Cut and hide the yarn.

Right Foot
we crochet similarly to the left 1-15 rows.
16. 24sc, 5sc, 1ch
We put a marker and continue along the left leg
17. 24sc on the left foot, sc on ch, 24sc on the right, sc on ch(50)
18-23. (50sc) 6 rows
24. 12sc, dec, 21sc, dec, 13sc (48)
We make dec on the sides of the body.
25-26. (48sc)
27. (6sc, dec)*6 (42)
28-30. (42sc)
31. (5sc, dec)*6 (36)
32-34. (36)
35. 10sc, dec, 16sc, dec, 6 (34)
36. 9 sc, dec, 15sc, dec, 6 (32)
37. 8sc, dec, 15, dec, 5 (30)
38. (30)
39. (3sc, dec)*6 (24)
40-41. (24)
42. (2sc, dec)*6 (18)
43. (18), slst
Cut the yarn and hide the tail.
Head
1. 6sc in MR
2. 6inc (12)
3. (1sc, inc)*6 (18)
4. (2sc, inc)*6 (24)
5. (3sc, inc)*6 (30)
6. (4sc, inc)*6 (36)
7. (5sc, inc)*6 (42)
8. (6sc, inc)*6 (48)
9. (7sc, inc)*6 (54)
10-17. (54sc)
18. (7sc, dec)*6 (48)
19. (6sc, dec)*6 (42)
20. (5sc, dec)*6 (36)
21. (4sc, dec)*6 (30)
22. (3sc, dec)*6 (24)
23. (2sc, dec)*6 (18)
Cut off the yarn and leave a ponytail to sew the head to the body.

Upper legs
1. 6sc in MR
2. 6inc (12)
3-7. (12sc)
8. dec, 10sc (1)
9-19 (11sc)
Cut the yarn. Leave the tail for sewing.
Ears
1. 4sc in MR
2. (1sc, inc)*2 (6)
3. 2sc, inc)*2 (8)
4. (3sc,inc)*2 (10)
5. (4sc,inc)*2 (12)
6-8. (12sc)
Cut the yarn.
Leave the tail for sewing
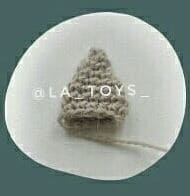
Muzzle
1. 6 sc in MR
2. 6inc (12)
3. (1sc,inc*6 (18)
4. (2sc,inc)*6 (24)
5. 11sc, slst
Tail
1. 6sc in MR
2. 6inc (12)
3-23. (12sc)
24. fold together and crochet 6 sc
Assembly
1. Sew the torso and head.
2. We make out the cat’s face.
– Place the eyes between 10-11 rows
6 columns spaced apart
– Sew the muzzle between 12-16 rows, adding filler to it.
– We embroider the nose, mouth, antennae.
3. Move the ears, choose a good place for sewing.
4. Sew the upper legs on the sides of the body.
5. Along the line of the middle of the back, between 23-24 rows we sew a tail
6. If the yarn is fleecy, you can comb the cat. I will comb it with a piece of Velcro that comes in for fastening clothes.
Everything. Now the cat is ready. We kiss him on the nose and give him a name.
