


Hello all friends,
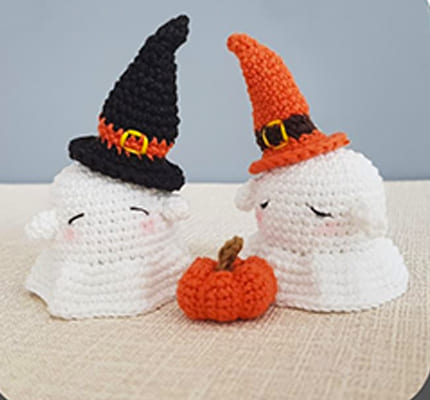
There are only a few days left until Christmas time, we are making crochet patterns for our homes and Christmas trees. Today I bring you a wonderful crochet snowman pattern. You can use this cute crochet snowman amigurumi toy, which is completely free, as a decoration for your home or your Christmas trees. You can complete it very simply thanks to the detailed step by step pattern instruction.
Your children will love this snowman, which looks very cute with its green and red crochet hat and green scarf. You can hang it on your trees by making more or you can gift it to your loved ones at Christmas time. Stay tuned for more free amigurumi patterns.
Christmas Crochet Snowman Yuki Amigurumi Free Pattern
Designer
Instagram: the_chloe_box
Materials and Tools
Yarn: worsted weight yarn
Colors:
•White
•Orange
•Red
•Green
•Brown
Mercerized yarn
Colors: Black
Fiberfill
Pins
Yarn needle
Sewing needle
Stitch marker
3mm crochet hook
1.25mm crochet hook
Scissors
Abbreviations
Rnd– round
Sc– single crochet
Inc– increase
Dec– decrease
Slst– slip stitch
Sts– stitches
Ch– chain
Hdc– half double crochet
BLO– back loop only
FLO– front loop only
(…)*– repeat instructions in the round bracket for the indicated number of times
[]– number of stitches in each round/ row
Head to the bottom of the body
(white)
Rnd 1: 6sc in magic ring [6]
Rnd 2: (inc)*6 [12]
Rnd 3: (1sc,inc)*6 [18]
Rnd 4: (2sc,inc)*6 [24]
Rnd 5: (3sc,inc)*6 [30]
Rnd 6: (4sc,inc)*6 [36]
Rnd 7: (5sc,inc)*6 [42]
Rnd 8-14: 42 sc (7 rounds) [42]
Rnd 15: (12sc,dec)*3 [39]
Rnd 16: (11sc,dec)*3 [36]
Rnd 17: (4sc,dec)*6 [30]
Rnd 18: (8sc,dec)*3 [27]
Rnd 19: (7sc,dec)*3 [24]
Start stuffing the head, continue as you crochet.
Rnd 20: FLO 24sc [24]
Rnd 21: (1sc,inc)*12 [36]
Rnd 22: (5sc,inc)*6 [42]
Rnd 23: (6sc,inc)*6 [48]
Rnd 24-28: 48 sc (5 rounds) [48]
Rnd 29: (6sc,dec)*6 [42]
Rnd 30: (5sc,dec)*6 [36]
Rnd 31: (1sc,dec)*12 [24]
Rnd 32: (2sc,dec)*6 [18]
Rnd 33: (1sc,dec)*6 [12]
Rnd 34: (dec)*6 [6]
Slst. Cut the yarn leaving a long tail for closing the gap. Add more stuffing, weave in and out through front loop of each remaining 6 stitches. Pull tight to close the gap then knot the yarn and hide yarn tail in the body.
After crocheting the body and head of the cute crocheted snowman, we move on to the construction of his arms.
Arms
(Make 2) (Brown)
Rnd 1: 6 sc in magic ring [6]
Rnd 2-8: 6 sc (7rounds) [6]
Slst. Cut the yarn leaving a long tail for sewing. Stuff the arms.
After crocheting her arms, we will make thumbs so that her hands look like a piece of twig.
Thrumb
(Make 2) (Brown)
Rnd 1: 6sc in magic ring [6]
Rnd 2-3: 6sc (2 rounds) [6]
Slst. Cut the yarn leaving a long tail for sewing. Stuff the thumbs.
We also crocheted the thumbs, now it’s time to make the orange carrot-looking nose.
Nose
(Orange)
Rnd 1: 3sc in magic ring [3]
Rnd 2: (inc)*3 [6]
Rnd 3: 6sc [6]
Rnd 4: (1sc,inc)*3 [9]
Rnd 5: 9 sc [9]
Slst. Cut the yarn leaving a long tail for sewing. Stuff the nose.
We have completed the carrot nose, we can move on to the eyes.
Eyes
You can use safety eyes instead.
(Black mercerized yarn)
(1.25mm crochet hook)
Rnd 1: 6sc in magic ring [6]
Rnd 2: (inc)*6 [12]
Slst. Cut the yarn leaving a long tail for sewing.
We’ve completed the eyes, now let’s make the snowman’s scarf.
Scarf
(Red)
Ch 60, insert hook in 3rd ch from the hook and crochet along, the foundation chain. (Turning ch count as 1st Hdc)
Row 1: 58 hdc [59]
Row 2: ch 2, turn, skip 1st Hdc, 58 Hdc. [59]
Fasten off, weave in yarn ends.
We have completed the snowman’s crochet scarf, now let’s make a beautiful hat.
Ribbed Band
(Green)
ch5
Row 1: insert hook in 3rd ch from the hook and crochet along the foundation chain. (Turning ch count as 1st Hdc) 3Hdc. [4]
Row 2-36: ch2, turn, skip 1st Hdc, BLO 2 Hdc, 1 Hdc [4].
At the end of last row fold in half then slip stitch both ends to from the band. Turn inside out to hide the seam. Continue to crochet the beanie.
Beanie
(Green)
Rnd 1-2: 36sc around at the top of the ribbed band for 2 rounds. [36]
Change color to red
Rnd 3: 36 sc [36]
Rnd 4: (4sc,dec)*6 [30]
Rnd 5: (3sc,dec)*6 [24]
Change color to green
Rnd 6: (2sc,dec)*6 [18]
Rnd 7: (1sc,dec)*6 [12]
Rnd 8: (dec)*6 [6]
Slst. Cut the yarn leaving a long tail for closing the gap. Weave in and out through front loop of each remaining 6 stitches. Pull tight to close the gap then knot the yarn and weave the end through stitches and cut the yarn tail.
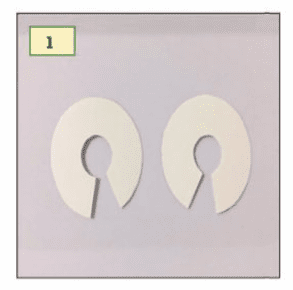
After completing the crochet hat, we will make the pompom part of the hat, how it is made is available in the pictures.
Pompoms
Make 2 cardboard disks. You can use glass as a guide. (see image 1).
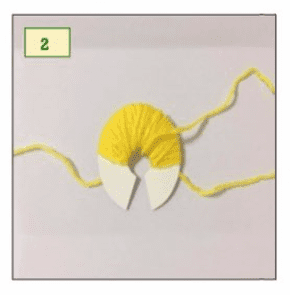
Insert piece of red yarn (you can use any color) between cardboard. You will use it later to secure pompoms. Wrap the yarn around the circles (see image 2).
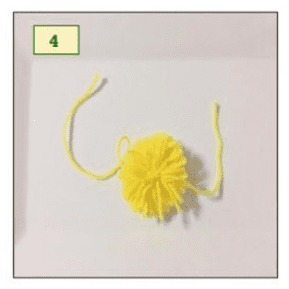
Cut the yarn. Grab the piece of yarn and make a knot to secure pompoms then remove the 2 cardboard the 2 cardboard disks. Leave long tail for sewing (see image 3 and 4).

Assembly
1. Sew the eyes, 7 stitches apart.
2. Sew the nose.
3. With black embroidery thread, sew the smile.
4. Sew arms and attach the thumb.
5. Sew pompoms on the top of the beanie.
6. Wrap the scarf around the neck and put the beanie.


is this working in a spiral or joined?