


Hello everyone, friends who love amigurumi,
Today we bring you a crochet reindeer christmas tree ornament pattern. First of all, I would like to thank the owner of the pattern. With only a few days left until Christmas, we have to finish the last tree decorations. That’s why I’m focusing on crochet tree decorations a little more these days. We are together today with a very beautiful crochet reindeer amigurumi pattern. With detailed step by step pattern instructions and pattern-making pictures, you’ll be able to finish this free amigurumi crochet christmas tree ornament very easily and quickly. Stay tuned for many more free crochet amigurumi patterns. Happy new year.
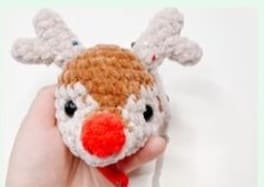
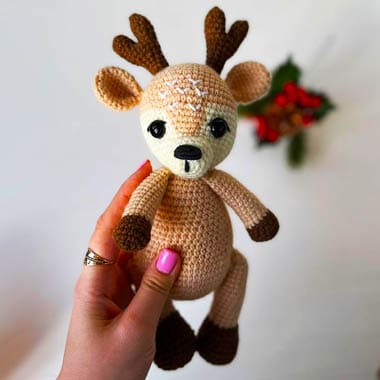
Crochet Reindeer Christmas Ornament Amigurumi Free Pattern
Designer
Instagram: doubledutchcrochetco
Materials
Yarn:
Colour A: Baby Snuggle Yarn in Teddy Bear
Colour B: Baby Snuggle Yarn in Soft Sand
Colour C: Baby Snuggle Yarn in Bright Red
Hook: 5.5mm
Saety eyes: 8-9mm
Fiber fill
Size: 5×5 in
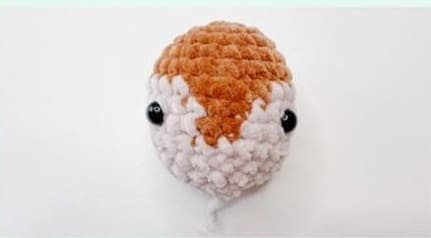
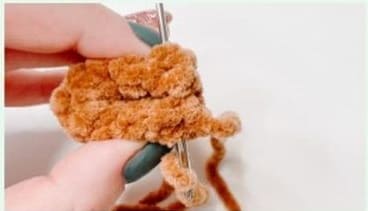
Head And Eyes
Start With Colour A
Row 1: mr, sc 6 (6)
Row 2: (inc)*6 (12)
Row 3: (sc,inc)*6 (18)
Row 4: sc 18 (18)
Row 5: (sc2,inc)*6 (24)
Row 6: (A) sc12, (B) sc4, (A) sc4, (B) sc4 (24)
Row 7: (A) sc11, (B) sc6, (A) sc2, (B) sc5 (24)
Row 8: (B) sc1, (A) sc9, (B) sc7, (A) sc2, (B) sc5 (24)
Row 9: (B) sc2, (A) sc8, (B) sc14 (24)
Row 10: (B) sc2, (A)(dec,sc2)*2, (B)(dec,sc2)*3, (dec)*1 (18)
Row 11: (B) sc2, (A) sc6, (B) sc10 (18)
Start stuffing
Row 12: (B)(dec)*1, (A)(sc,dec)*2, (B)(sc,dec)*3, sc1 (12)
Row 13: (B)(dec)*6 (6)
1. Before you finish the head, place the safety eyes on rows 7-8 of the head with 6-7 stitches in between.
2. Take one 12 strand of black, medium weight yarn. Using a yarn needle, insert into the corner of one eye. Plush yarn needle from first eye, over to the second eye.

3. Take strand from first eye, and using a yarn needle, go down one stitch and insert hook.

4. Push needle through the head. Repeat steps 2&3 for the other eye. Pull the two strands tight to bring the eyes in. Pull for the desired shape. Tie together, tie off and weave in ends.

Antlers And Snout
Antlers Part 1:
Start with colour B
Row 1: MR, sc6 (6)
Row 2-7: sc6 (6)
Attach antlers to row 2-4 of the head.
Antlers Part 2:
Start with colour B
Row 1: MR, sc4 (4)
Row 2-4: sc4 (4)
Attach to row 3-5 of antler number 1.
Snout
Start with colour B
Row 1: MR, sc4 (4)
Row 2: (B)(sc,inc)*1, (A)(sc,inc)*1 (6)
Row 3: (B)(inc)*3 (A) sc3 (9)
Row 4: (B)(sc,inc)*3, (A) sc3 (12)
Nose
Start with colour C
Row 1: MR, sc6 (6)
Row 2: (sc2,inc)*2 (8)
1. Make both parts of the antlers.

2. Using fabric pins, attach the smaller piece to the larger piece on row 3-5. Sew on.

3. Complete both antlers.
4. Create the snout and using fabric pins attach the snout to rows 8-11 of the head so the brown lines up with the brown. Sew on using a yarn needle.

5. Place the nose on the top of the snout on rows 1-3.

6. Using fabric pins, attach antlers to row 2-4 on either side. Sew on with a yarn needle.
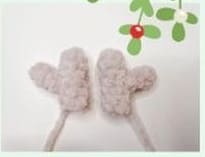
Ears
Start with colour A
Row 1: MR, sc6 (6)
Row 2: (inc)*6 (12) (12)
Row 3-5: sc 12 (12)
1. Pinch ear in half. Using a yarn needle, sew the bottom row together.
2. Using fabric pics, attach ears to rows 5-6 directyl below the antlers. Sew on using a yarn needle.

Face Details
1. Take a 16 strand of white yarn and insert it intro the bottom of row 6 centered on the head between the eyes.

2. Insert the needle one row up and one stitch over. Push the needle over two stitches. Pull through.

3. Then insert the needle back into the initial spot. Create these V shapes throughout the forehead.

