Hi everyone,
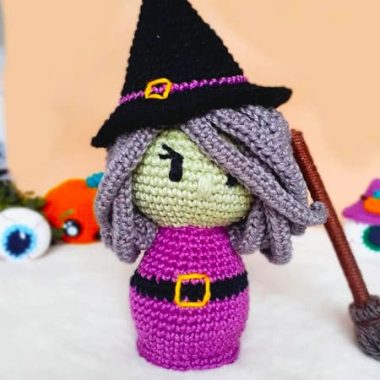
Halloween day has arrived. I shared an amigurumi pattern on the theme of witches, the time has come for you. It is very easy to do it step by step. It has a medium difficulty level. The people you give the amigurumi pattern to will be very happy. This amigurumi pattern is very special. You can knit the Amigurumi doll pattern for your children. You can use this amigurumi pattern for Halloween day decoration in your home.
It may take some time to make the Amigurumi witch hour come to the pattern. You can change the colors of all the parts as you like. You need to make sure that the Amigurumi pattern thread thickness is the same. You can make the hair color of the Amigurumi crochet doll pattern different. Red or yellow would look great. The amigurumi pumpkin patterns are crocheted with orange and yellow yarn. After completing the Amigurumi witch cauldron pattern, you can make a witch cauldron handle from fine copper wire. The amigurumi cat pattern is crocheted with black yarn. If you wish, you can knit with white or light blue yarn. Don’t forget to add the Amigurumi witch hour pattern to your favorites list.
PDF Cute Crochet Halloween Set Amigurumi Free Pattern
Designer
Instagram: Tu broche original
Etsy: Tu broche original
Vamos a tejer el patrón de muñeco amigurumi 🙂
ABBREVIATIONS:
MR= Magic Ring
Ch= Chain
Sc= Single crochet
Inc= Increase
dec= Decrease
sl st= slip stich
BLO= Back loop
FLO= Front loop
You have to have basic knowledge of crochet, joining pieces.
Easy level
Legs (x2):
In black:
1. 6sc en RM
2. (1sc, inc) x 3 (9)
3. 9sc
In white:
4-5. 9sc
In black:
6-7. 9sc
In white:
8-9. 9sc
In black:
10-12. 9sc
Place 8mm safety eyes between turns 33 and 34 with 8sc of separation.

Body and Head
13. Join with sl st, and work 18sc (9sc on one leg and 9sc on the other)
14. 18sc
15. BLO, 18sc
16. 18 sc
17. 7sc, dec, 7sc, dec (16)
18. 16sc
19. 6sc, dec, 6sc, dec (14)
20. 14sc
21. 5sc, dec, 5sc, dec (12)
22. 12sc
23. 6 dec Change colour (Green)
24. 6sc
25. 6 inc (12)
26. (1 sc, inc) x6 (18)
27. lsc, inc, (2sc, inc) x5, 1 sc (24)
28. (3sc, inc) x6 (30)
29. 2sc, inc, (4sc, inc) x5, 2sc (36)
30. (5sc, inc) x6 (42)
31-36. 42sc
37. (5sc, dec) x6 (36)
38. 2sc, dec, (4sc, dec) x5, 2sc (30)
39. (3sc, dec) x6 (24)
40. lsc, dec, (2sc, dec) x5, 1 sc (18)
Fill out
41. (1 sc, dec) x6 (12)
42. 6 dec (6)
Close

Hair
1. 6sc en RM
2. 6 inc (12)
3. (1sc, inc) x6 (18)
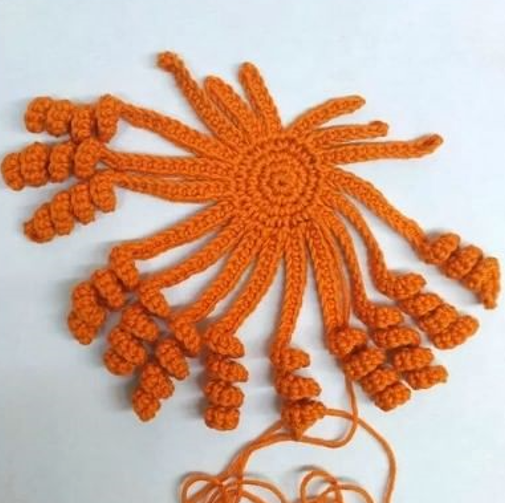
Made 31ch from the 2nd ch work (20inc sc, 10sc and close with sc in the next stitch) x12 (Made 13ch, from the 2nd ch work , 12sc) x1 (Made 5ch, from the 2nd ch work, 7sc) x4 (Made 13ch, from the 2nd ch work , 12sc) x1 Close and Leave a thread of approx 100 cm to sew
Arms
In black:
1. 6sc en RM
2-3. 6sc
4. (1 sc, inc) x3 (9)
5-6. 9sc
7. (2sc, inc) x3 (12)
8. 12sc Leave long thread to sew
In green:
1. 6sc en RM
2-5. 6sc
Close, then we will stick it with hot silicone inside the black color.

Hat
1. 6sc en RM (6)
2-4. 6sc
5. (1sc, inc) x3 (9)
6. 9sc
7. (2sc, inc) x3 (12)
8. 12sc
9. (1sc, inc) x6 (18)
10. 18sc
11. (2sc, inc) x6 (24)
12. 24sc
13. (3sc, inc) x6 (30)
14. 30sc
15. (4sc, inc) x6 (36)
16. 36sc
17. (5sc, inc) x6 (42) Change colour (Purple)
18-19. 42sc
Change colour (Black)
20. FLO (6sc, inc) x6 (48)
21. (7sc, inc) x6 (54)
22. 4sc, inc (8sc, inc) x5, 4sc (60)
23. (9sc, inc) x6 (66)
close and hide the strand

Ribbon Skirt
1. 21ch, from the 2nd ch work, made 20 sl st
Leave long thread to sew

Skirt
In the round 15 body, in black:
1. (1sc, inc) x6 (18)
2-3. 18sc
4. (2sc, inc) x6 (24)
5. 24sc
Close and hide the strand

Cat Salem

You have to have basic knowledge of crochet, joining pieces. Easy level
BODY AND HEAD:
1. 6sc en RM (6)
2. 6 inc (12)
3. (1sc, inc) x6 (18)
4. (2sc, inc) x6 (24)
5-8. 24sc
9. (2sc, dec) x6 (18)
10. (1 sc, dec) x6 (12)
11. 12sc
12. (3sc, inc) x3 (15)
13-15. 15sc
16. (4sc, inc) x3 (18)
17. 18sc
Fill as you knit
18. (1 sc, dec) x6 (12)
19. 6 dec
Close and hide strand.
Place 5mm security eyes between rounds 6 and 7 with Esc of separation.

TAIL:
1. 13 ch, from the 2nd ch work 12 sl st. Leave long thread to sew

EARS (X2)
1. 5ch, knit 4sc, 1 ch and spin
2. 2dec, ch and spin
3. 1 dec and close
Leave long thread to sew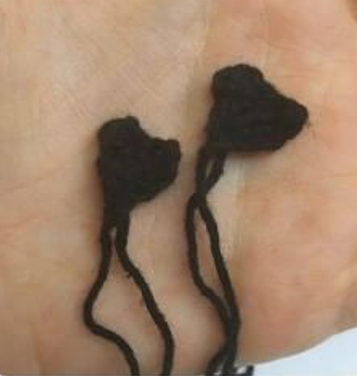
FRONT LEGS (x2)
1. 4sc en RM
2-5. 4sc
Leave long thread to sew.

BACK LEGS (x2)
1. 6sc en RM (6)
2. 6sc
Close with 3sc and knit 3ch, 2sc
Close with sl st and leave long thread to sew to the body.

Let’s crochet the witch’s cauldron from the amigurumi pattern 🙂
Cauldron
1. 6sc en RM (6)
2. 6 inc (12)
3. (1sc, inc) x6 (18)
4. 1 sc, inc (2sc, inc) x5, 1 sc (24)
5. (3sc, inc) x6 (30)
6. 2sc, inc (4sc, inc) x5, 2sc (36)
7. (5sc, inc) x6 (42)
8-9. 42sc
10. (5sc, dec) x6 (36)
11-12. 36sc
13. 2sc, dec (4sc, dec) x5, 2sc (30)
14-15. 30sc
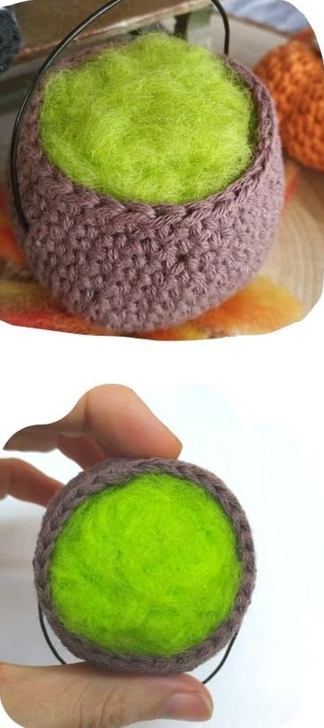
Finish off and fill with a little wadding and to decorate with a little green felting wool and black wire to create the handle.
Bonfire
1. 6sc en RM (6)
2. 6 inc (12)
3. (1sc, inc) x6 (18)
4. 1 sc, inc (2sc, inc) x5, 1 sc (24)
5. (3sc, inc) x6 (30)
6. BLO 30sc
7-8. 30sc
Close on itself to create height and decorate with some red, orange and yellow felting yarn.
I have glued the felting wool with a little hot silicone.

Let’s crochet amigurumi pumpkin pattern 🙂
Pumpkin

Body of Pumpkin
1. 6sc en MR (6)
2. 6 inc (12)
3. (1 sc, inc) x6 (18)
4. lsc, inc (2sc, inc) x5, 1 sc (24)
5. (3sc, inc) x6 (30)
6-10. 30 sc
11. (3sc, dec) x6 (24)
12. lsc, dec (2sc, dec) x5, lsc (18)
13. (1sc, dec) x6 (12)
14. 6 dec
Close and leave a long strand of 50 cm approx. to shape the pumpkin.
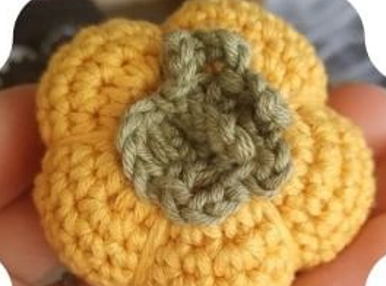
With the help of a wool needle, shape the pumpkin by passing the thread through the center of the upper and lower part and tightening the thread a little as shown in the images.

Leaf
1. 6sc en MR (6)
2. (1 sc, 4 ch) x 6 (6) Close with a sl st, ch 5 and knit 4 sl st to make the tail of the pumpkin. Bind off and sew in the center of the top.
Let’s make the flying broom of the amigurumi pattern 🙂
Escoba Broom
Make the Broom
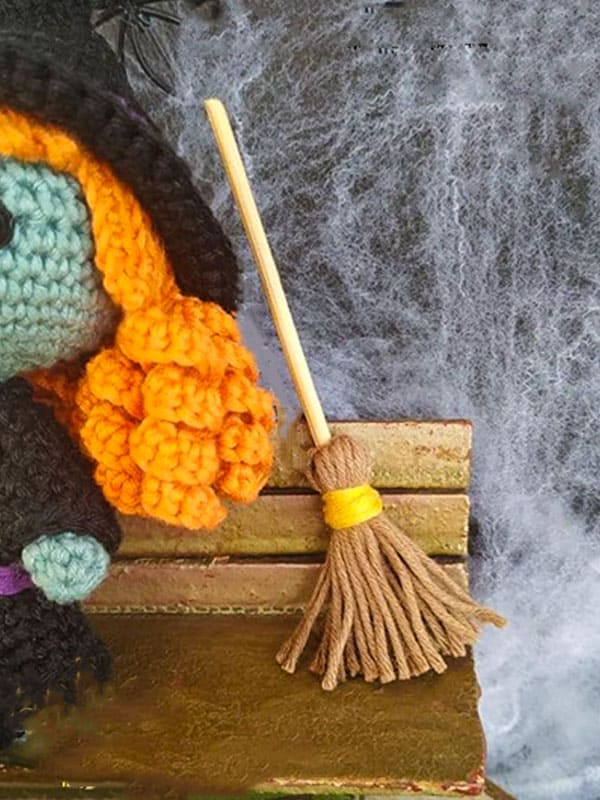
Take a stick of 9 cm approx. with brown thread cut pieces of 7 cm approx. and fold in half and with yellow thread go around to hold everything to the stick, hold tightly. To make it more subject you can give it a point with hot silicone.
Congratulations, you have completed the witch’s clock amigurumi pattern. 🙂


