


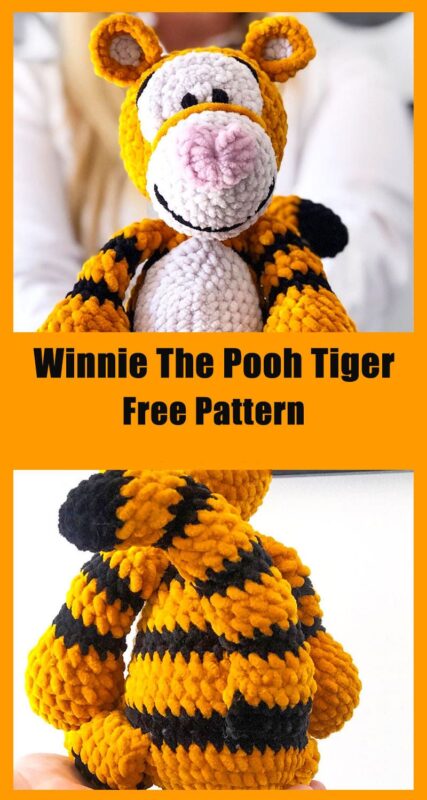
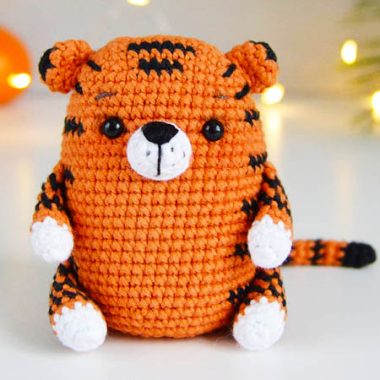
Do you know Tigger? He is a very cute tiger. If you know the cartoon Winnie the pooh, you definitely know Tigger. Today we will make crochet Tigger amigurumi using velvet yarn. Thank you very much to the person who made the model. A truly gorgeous crochet tiger pattern. The materials used are of very high quality and are extremely symmetrical. You can see how gorgeous your crochet amigurumi will be when you use a yarn of this quality.
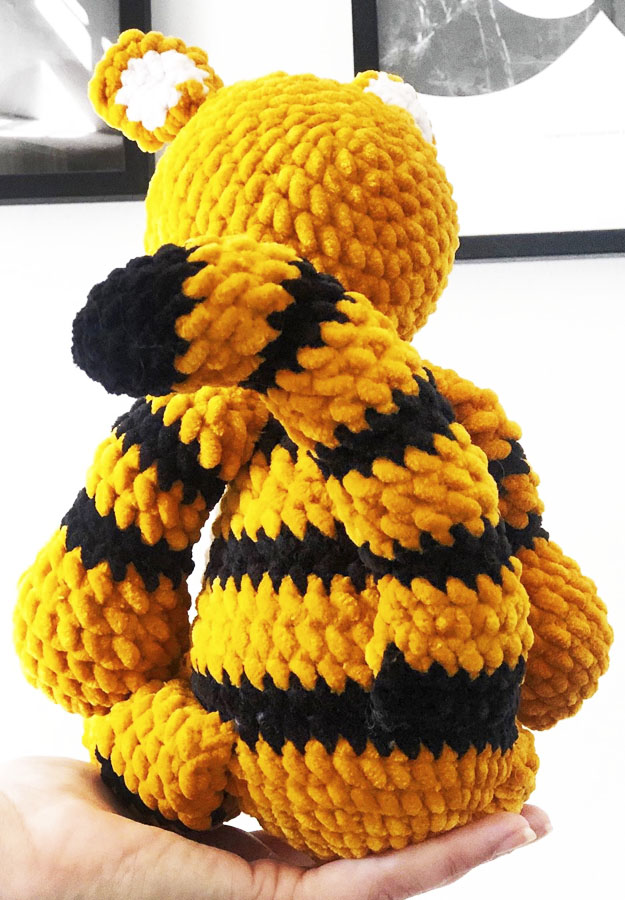
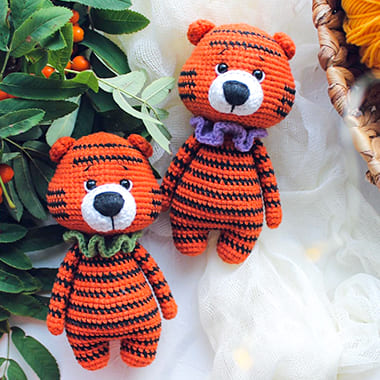
Tigers are wild cats that live in the jungles of Asia. But Tigger, one of the winnie the pooh characters, is quite cute and extremely friendly. He is always clumsy and endears himself very much. I would not recommend going out of orange, black and white in color selection. However, as seen in the pictures, pink color was used on the nose and ears of the tiger. The crochet tiger amigurumi pattern is completely free. Now let’s crochet Tigger amigurumi step by step.
PDF Mini adventures of Winnie the Pooh “Tigger” amigurumi crochet free pattern
Designer: catknit_
MATERIALS USED
(You’ll need 2 balls of the Mustard yarn)
Colour A: Cygnet Yarns Chenille Chucky, Mustard
Colour B: James C Brett Fultterby Chunky, Oatmeal
Colour C: James C Brett Flutterby Chunky, Black
Colour D: James C Brett Fultterby Chunky, Rose
Crochet Hook size: 4mm
Toy Stuffing
Stitch marker
HEAD PART 1
1. Using colour A, work 6sc in magic ring (6)
2. inc in each st(12)
3. *1sc, 1inc** repeat * to ** 6 times (18)
4. *2sc, 1inc** repeat * to ** 6 times (24)
5. *3sc, 1inc** repeat * to ** 6 times (30)
6. *4sc, 1inc** repeat * to ** 6 times (36)
7-11. Sc in each st
12. *4sc, 1 inv.dec** repeat * to ** 6 times (30)
13. *3sc, 1 inv.dec** repeat * to ** 6 times (24)
14. *2sc, 1 inv.dec** repeat * to ** 6 times (18)
15. *1sc, 1 inv.dec** repeat * to ** 6 times (12)
Stop crocheting and stuff the head firmly.
16. Inv.dec in each st (6)
Fasten off, leaving a long tail for sewing the last stitches together.
HEAD PART 2
1. Using colour B, work 6 sc in magic ring (6)
2. Inc each st (12)
3. *1sc, 1inc** repeat * to ** 6 times (18)
4. *2sc, 1inc** repeat * to ** 6 times (24)
5-10. Sc in each st
Fasten off, leaving a long tail for sewing the muzzle to the head.
ASSEMBLY
The muzzle will be sewn on to the decreasing side of the head to keep the neater looking stitches at the back of the head. Sew the muzzle to the head around round 14, stuff as you go along.
HEAD PART 3
Now you will work as you would in a magic ring but instead of joining after round 1, you will chain 1 at the end of each round and turn your work to get a half circle.
1. Using Colour B work 6 sc in magic ring (6) ch1, turn.
2. Inc in each st (12) ch1, turn.
3. Sc in each st, ch1, turn.
4. *1sc, 1inc** repeat * to ** 6 times (18) ch1, turn.
5. Sc in each st
Fasten off, leaving a long tail for sewing the eye area to the head.
ASSEMBLY
Sew in place just above the muzzle, it should stretch to between round 9 and 10 of the head. Make sure you stretch the sides so the width is approximately the same as the muzzle.
Using a long tail of colour A, make 2 long stitches across the muzzle to cover up where the two parts join.
For the eyes, these will sit on bottom of the half circle, just above the muzzle. Using colour C, make a stitch on the outside of round 1, across the height of one stitch. Go over the same stitch 4 times.
For the eyebrowns, these will sit just above where the half circle ends. Using colour C, count 4 stitches in between, make a stitch across 3 stitches down the side of the half circle, go over once more.
NOSE
Using colour D, make a magic ring, chain 3.
In the magic ring make the following stitches: 2tr, 2dc,
2hdc, 1sc, 2hdc, 2dc, 2tr, chain 3, slst in to the magic ring.
Now tighten the magic ring and you should have a heart shaped nose.

ASSEMBLY
Stitch in place just above round 1 to between round 6 and 7 of the muzzle.
MOUTH
The mouth is sewn on in between round 6 and 7, make a stitch across the full length with colour C, don’t secure in place yet. The middle of the mouth will sit between round 4 and 5 so make sure you are happy with the position before securing in place. You can do this by using a bit of glue or making 3 stitches in colour C by doing a loop around the mouth in the same stitch.
EARS
1. Using Colour B work 6sc in magic ring (6)
2. Inc in each st (12)
3. Change to colour A, *1sc, 1inc** repeat to ** 6 times (18)
Fasten off, leaving a long tail for sewing the ears to the head.
ASSEMBLY
Attach the ears to round 8 of the head, leaving 7 stitches in between.
BODY
1. Using colour A, work 6sc in magic ring (6)
2. Inc in each st (12)
3. *1sc, 1inc** repeat * to ** 6 times (18)
4. *2sc, 1inc** repeat * to ** 6 times (24)
5. *3sc, 1inc** repeat * to ** 6 times (30)
6. *4sc, 1inc** repeat * to ** 6 times (36)
7. Sc in each st
8-9. Change to Colour C sc in each st
10-12. Change to Colour A, sc in each st
13. Change to Colour C, sc in each st
14. *4sc, 1inv.dec** repeat * to ** 6 times (30)
15. Change to colour A, sc in each st
16. *3sc, 1inv.dec** repeat * to ** 6 times (24)
17. sc in each st
18. Change to Colour C, sc in each st
19. *2sc, 1inv.dec** repeat * to ** 6 times (18)
20. Change to Colour A, sc in each st
21. *1 sc, 1inv.dec** repeat * to ** 6 times (12)
22. Sc in each st
Fasten off, leaving a long tail for sewing the body to the head.
Stuff the body firmly.
The body is attached across row 9-12 of the head.
BELLY
1. Chain 11.
2. From second chain from the hook, sc 10.
3. Continue on the other side of the side and sc 10.
4-5. Sc around the full piece again, adding 1 extra sc on each end
6-7. Sc around the full piece again, adding 2 extra sc on each end with one st in between
8. Sc around the full piece again, on each end count 7sts, now: 1inc, 1sc, 1inc, 1sc, 1inc.
9. Sc around the full piece again, on each end count 9sts, now: 1inc, 3sc, 1inc, 3sc, 1inc
Fasten off leaving a long tail for sewing the belly to the body.
Attach the belly across row 5-20 of the body.
LEGS(2 TIMES)
1. Using colour A, work 6sc in magic ring (6)
2. Inc in each st (12)
3. *1sc, 1inc** repeat * to ** 6 times (18)
4. *2sc, 1inc** repeat * to ** 6 times (24)
5-7. Sc in each st.
8. *2sc, 1inv.dec** repeat * to ** 6 times (18)
9. *1sc, 1inv.dec** repeat * to ** 6 times (18)
10. Sc in each st
11-12. Change to Colour C, sc in each st
13-14. Change to Colour A, sc in each st
15-16. Change to Colour C, sc in each st
17-21. Change to Colour A, sc in each st
Fasten off, leaving a long tail for sewing the legs to the body.
Stuff the bottom part of the legs but not the thinner part to allow for movement.
Attach the legs on each side of the body, just below where the first black stripe starts on the body.
ARMS (2 TIMES)
1. Using colour A, work 6 sc in magic ring (6)
2. Inc in each st (12)
3. *1sc, 1inc** repeat* to ** 6 times (18)
4-6. Sc in each st.
7. *1sc, inv.dec** repeat * to ** 6 times (12)
8. Sc in each st
9-10. Change to Colour C, sc in each st
11-12. Change to Colour A, sc in each st
13. Change to Colour C, sc in each st
14-15. Change to Colour A, sc in each st
16. *1sc, inv.dec** repeat * to ** 4 times (8)
Fasten off, leaving a long tail for sewing the arms to the body.
Stuff the bottom part of the arms but not the thinner part to allow for movement.
Attach the arms 1 row down from where you attached the head to the body.
TAIL
1. Using Colour C, work 6 sc in magic ring (6)
2. Inc in each st (12)
3-5. Sc in each st.
6-8. Change to Colour A, sc in each st
9-10. Change to Colour C, sc in each st
11-13. Change to Colour A, sc in each st
14-15. Change to Colour C, sc in each st
16-18. Change to Colour A, sc in each st
19-20. Change to Colour C, sc in each st
21-23. Change to Colour A, sc in each st
24-25. Change to Colour C, sc in each st
Fasten off leaving a long tail for sewing the tail to the body. Stuff the tail firmly. Attach the tail at the back of the body in the middle of the first black stripe.

Can I sell my creations using this pattern?
Yes you can sell your dolls.
How big is the finished tigger ???
Great pattern. Very easy to follow. Thank you.
I was wondering how big is the final product