


Greetings to all friends,
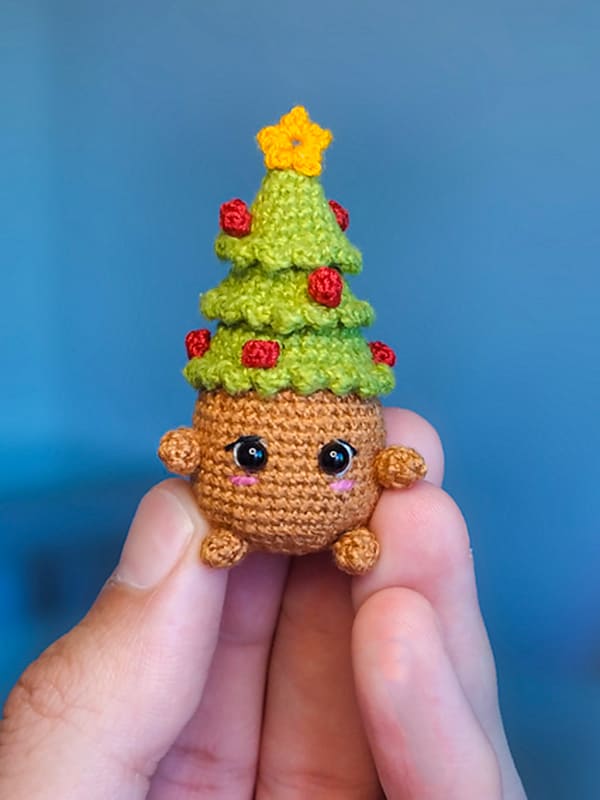
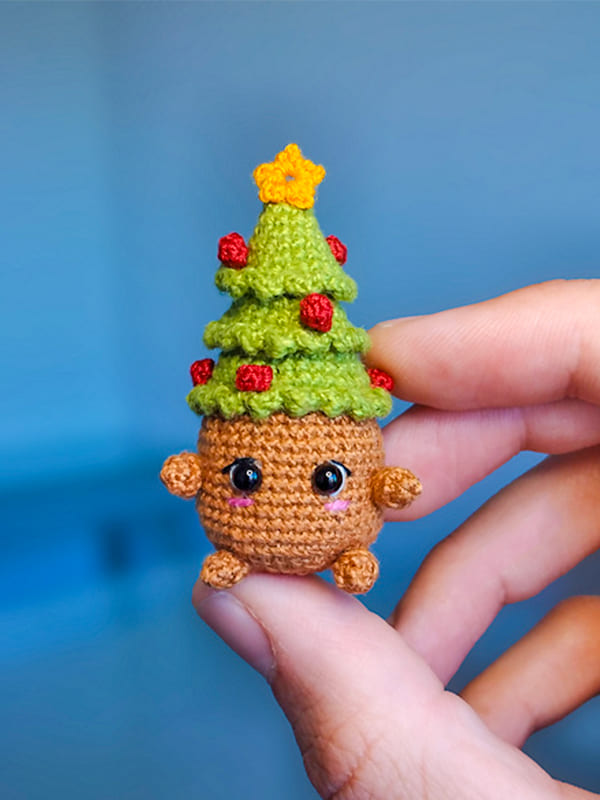
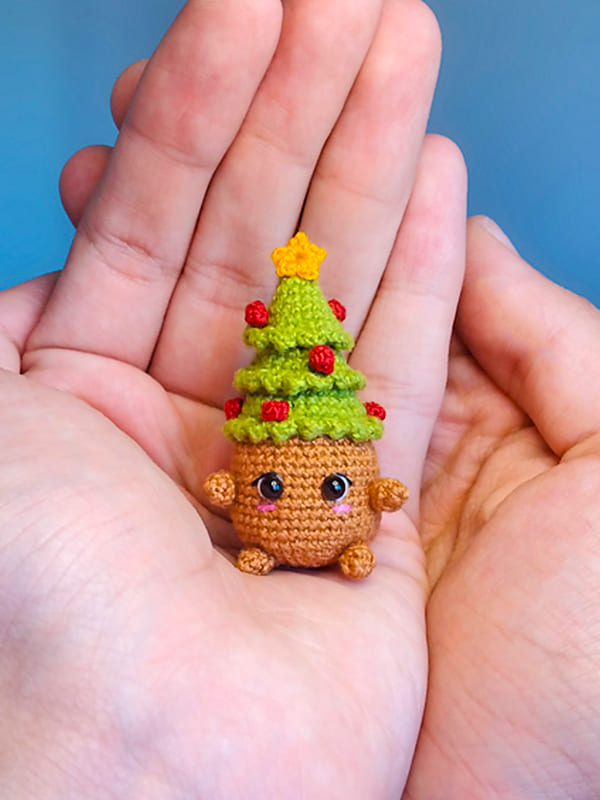
Today we have a wonderful surprise for you, a completely free crochet little and cute Christmas tree. You can use this cute crochet amigurumi Christmas tree as a Christmas tree decoration or as a table decoration in your home. It’s not a bad idea to gift it to your loved ones as a handmade gift. With the detailed step by step pattern description, you will complete this cute crochet Christmas tree quickly and easily.
Christmas time is only a few days away, so hurry up and make a beautiful ornament for your Christmas tree. Make your night even more beautiful with handmade crochet amigurumi patterns. Now we leave you with the cute little Christmas tree pattern.
Tiny Crochet Christmas Tree Amigurumi Free Pattern
Designer
Instagram: amigurumi.tiny
Etsy: amigurumi.tiny
Ravelry: amigurumi.tiny


Abbreviations
Magic ring
Chain = ch
Single crochet = sc
Increase = inc
Decrease = dec
Half double crochet = hdc
Slip stitch = slst
Stitches = sts
Materials
•1.25mm crochet hook
•Yarn according to your crochet hook.
•Embroidery thread
•Tapestry needle or sewing needle
•Pins
•Stuffing
•Eyes of your choice
•Scissors
Final size: about 5cm
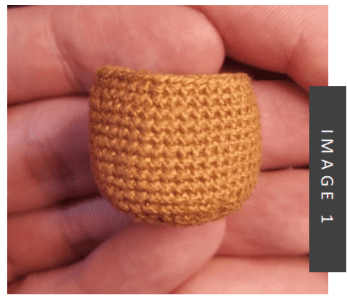
Stem
Rnd 1. 6sc in magic ring (6sts)
Rnd 2. 6inc (12sts)
Rnd 3. (1inc, 1sc) x6 (18sts)
Rnd 4. (1inc, 2sc) x6 (24sts)
Rnd 5. (1inc, 3sc) x6 (30sts)
Rnd 6. (1inc, 4sc) x6 (36sts)
Rnd 7. (1inc, 5sc) x6 (42sts)
Rnd 8-15. 42sc around (42sts)
Rnd 16. (1dec, 5sc) x6 (36sts)
Rnd 17. 36sc around (36sts)
If you’re going to put safety eyes, place them now between rounds 12 and 13, with about 6 stitches of distance between them.
Fasten off! [Image 1]
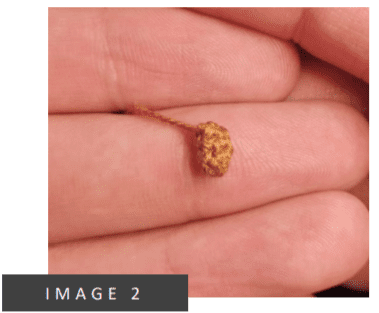
Arms and Legs
Let’s make 4!
Rnd 1. 6sc in magic ring (6sts)
Rnd 2-3. 6sc around (6sts)
Fasten off and leave a long tail for
sewing! [Image 2]
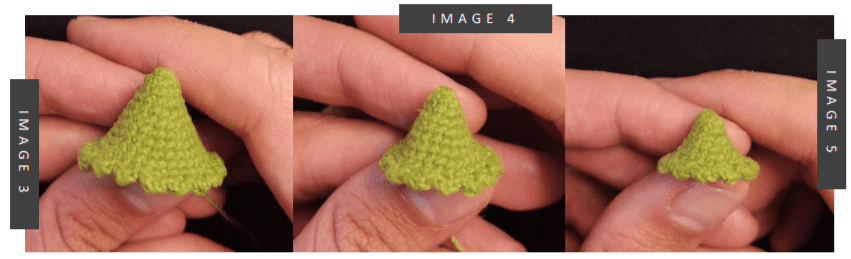
Tree
Part 1
Rnd 1. 6sc in magic ring (6sts)
Rnd 2. (1inc, 1sc) x3 (9sts)
Rnd 3. (1inc, 2sc) x3 (12sts)
Rnd 4. (1inc, 3sc) x3 (15sts)
Rnd 5. (1inc, 4sc) x3 (18sts)
Rnd 6. (1inc, 5sc) x3 (21sts)
Rnd 7. (1inc, 6sc) x3 (24sts)
Rnd 8. (1inc, 7sc) x3 (27sts)
Rnd 9. (1inc, 8sc) x3 (30sts)
Rnd 10. (1inc, 9sc) x3 (33sts)
Rnd 11. (1inc, 10sc) x3 (36sts)
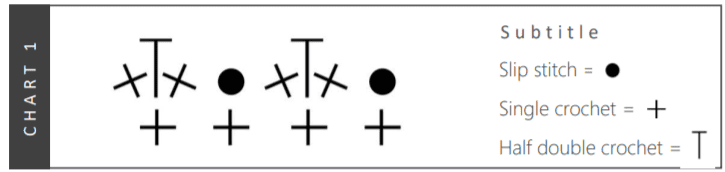
Rnd 12. ([1sc, 1hdc, 1sc together in the same stitch] 1slst) x18 (72sts) [Chart 1] [Image 3]
Part 2
Rnd 1. 6sc in magic ring (6sts)
Rnd 2. (1inc, 1sc) x3 (9sts)
Rnd 3. (1inc, 2sc) x3 (12sts)
Rnd 4. (1inc, 3sc) x3 (15sts)
Rnd 5. (1inc, 4sc) x3 (18sts)
Rnd 6. (1inc, 5sc) x3 (21sts)
Rnd 7. (1inc, 6sc) x3 (24sts)
Rnd 8. (1inc, 7sc) x3 (27sts)
Rnd 9. (1inc, 8sc) x3 (30sts)
Rnd 10. ([1sc, 1hdc, 1sc together in the same stitch] 1slst) x15 (60sts) [Chart 1].
Fasten off and leave a long tail [Image.4].
Part 3
Rnd 1. 6sc in magic ring (6sts)
Rnd 2. (1inc, 1sc) x3 (9sts)
Rnd 3. (1inc, 2sc) x3 (12sts)
Rnd 4. (1inc, 3sc) x3 (15sts)
Rnd 5. (1inc, 4sc) x3 (18sts)
Rnd 6. (1inc, 5sc) x3 (21sts)
Rnd 7. (1inc, 6sc) x3 (24sts)
Rnd 8. ([1sc, 1hdc, 1sc together in the same stitch] 1slst) x12 (48sts) [Chart 1]
Fasten off and leave a long tail [Image.5].
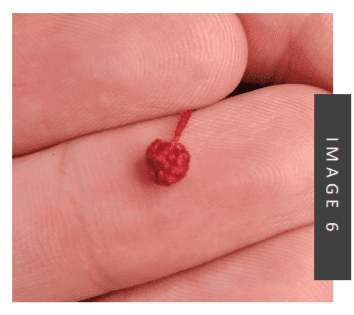
Ornaments
Balls
Let’s make 8!
Rnd 1. 5sc in magic ring (5sts)
Rnd 2. 5sc around (5sts)
Close the stitches, fasten off and leave a long tail! [Image 5]
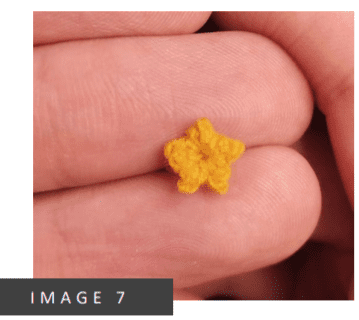
Star
Rnd 1. In the magic ring (1ch, 1sc, 2ch, 1sc, 1ch, 1slst) x5. [Chart 2]
Close the magic ring.
Fasten off and leave a long tail to sewing. [Image 7]

Assembling
Sew arms between rounds 11 and 12 with about 17sts of distance between them. Position the legs between rounds 5 and 6 with about 7sts between them [Image 8]. Stuff the stem and the part 1 of the tree and sew it [Image 9]. Let’s sew part 2 over part 1 of the tree. In the end, we’re going to sew part 3 over part 2. Fasten off and hide the yarn.

Put the star in the top of part 3 of the tree and sew it [Image 10]. Spread the balls around the tree randomly [Image 11]. Fasten off and hide the yarn. Use your imagination to make the embroidery of the face!
That’s it, you made it!

